Configuring Google Cloud Storage
Save your screenshots, PDFs and other renders to Google Cloud Storage from Urlbox
This guide will walkthough the process of configuring Google Cloud Storage (GCS) so that you can store screenshots and other renders directly to your bucket in Google Cloud, using either a private or public bucket.
Create a private Google Cloud Storage Bucket
Log in to your Google Cloud account and head to the Cloud Storage section from the sidebar. On the buckets sub page, click the Create button and fill out the form.
For this guide we'll call the bucket urlbox-renders-private.
Then you can choose where you want to store your bucket, choose a location that is closest to your users, then choose a storage class for your data.
The next section is Choose how to control access to objects. Since we want this bucket to be private, you should tick the box that says Enforce public access prevention on this bucket. If you do want to configure a public bucket instead see the section further down.
Under the Access control subheading, you can decide whether to use Uniform or Fine-grained access to control access to your objects. For this guide, we'll use Uniform access.
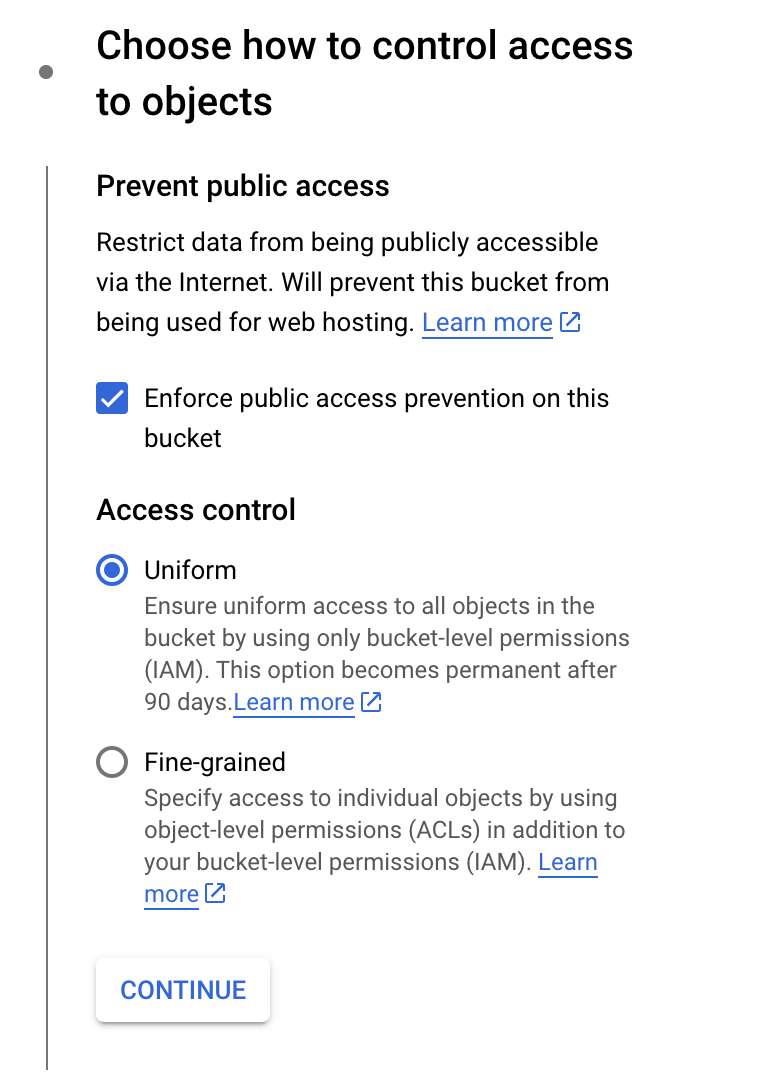
Finally, you can choose whether you want to protect your data, using a retention policy or versioning. For this guide, we'll select no protection.
Below are the bucket settings I configured for this guide:

Now click the Create button to create the bucket.
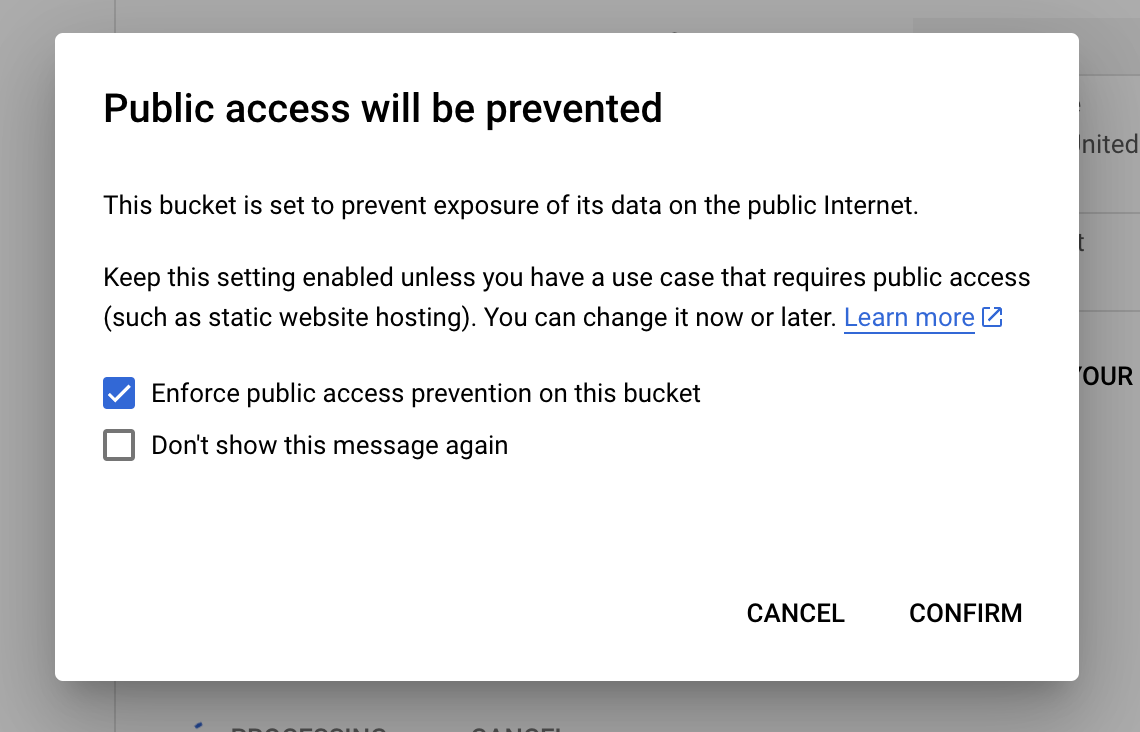
If you get a popup titled Public access will be prevented, just ensure the Enforce public access prevention on this bucket setting is checked and click confirm.
Create a service account
Now it's time to create a service account that Urlbox can use to upload screenshots and other renders to your bucket.
If you already have a service account that you'd like to use, you can skip this section.
Go to the IAM and admin > Service accounts page in Google Cloud, and click the Create Service Account button.
We'll name the service account urlbox-storage and give it a relevant description. You can skip the next sections and click Done to create the service account.
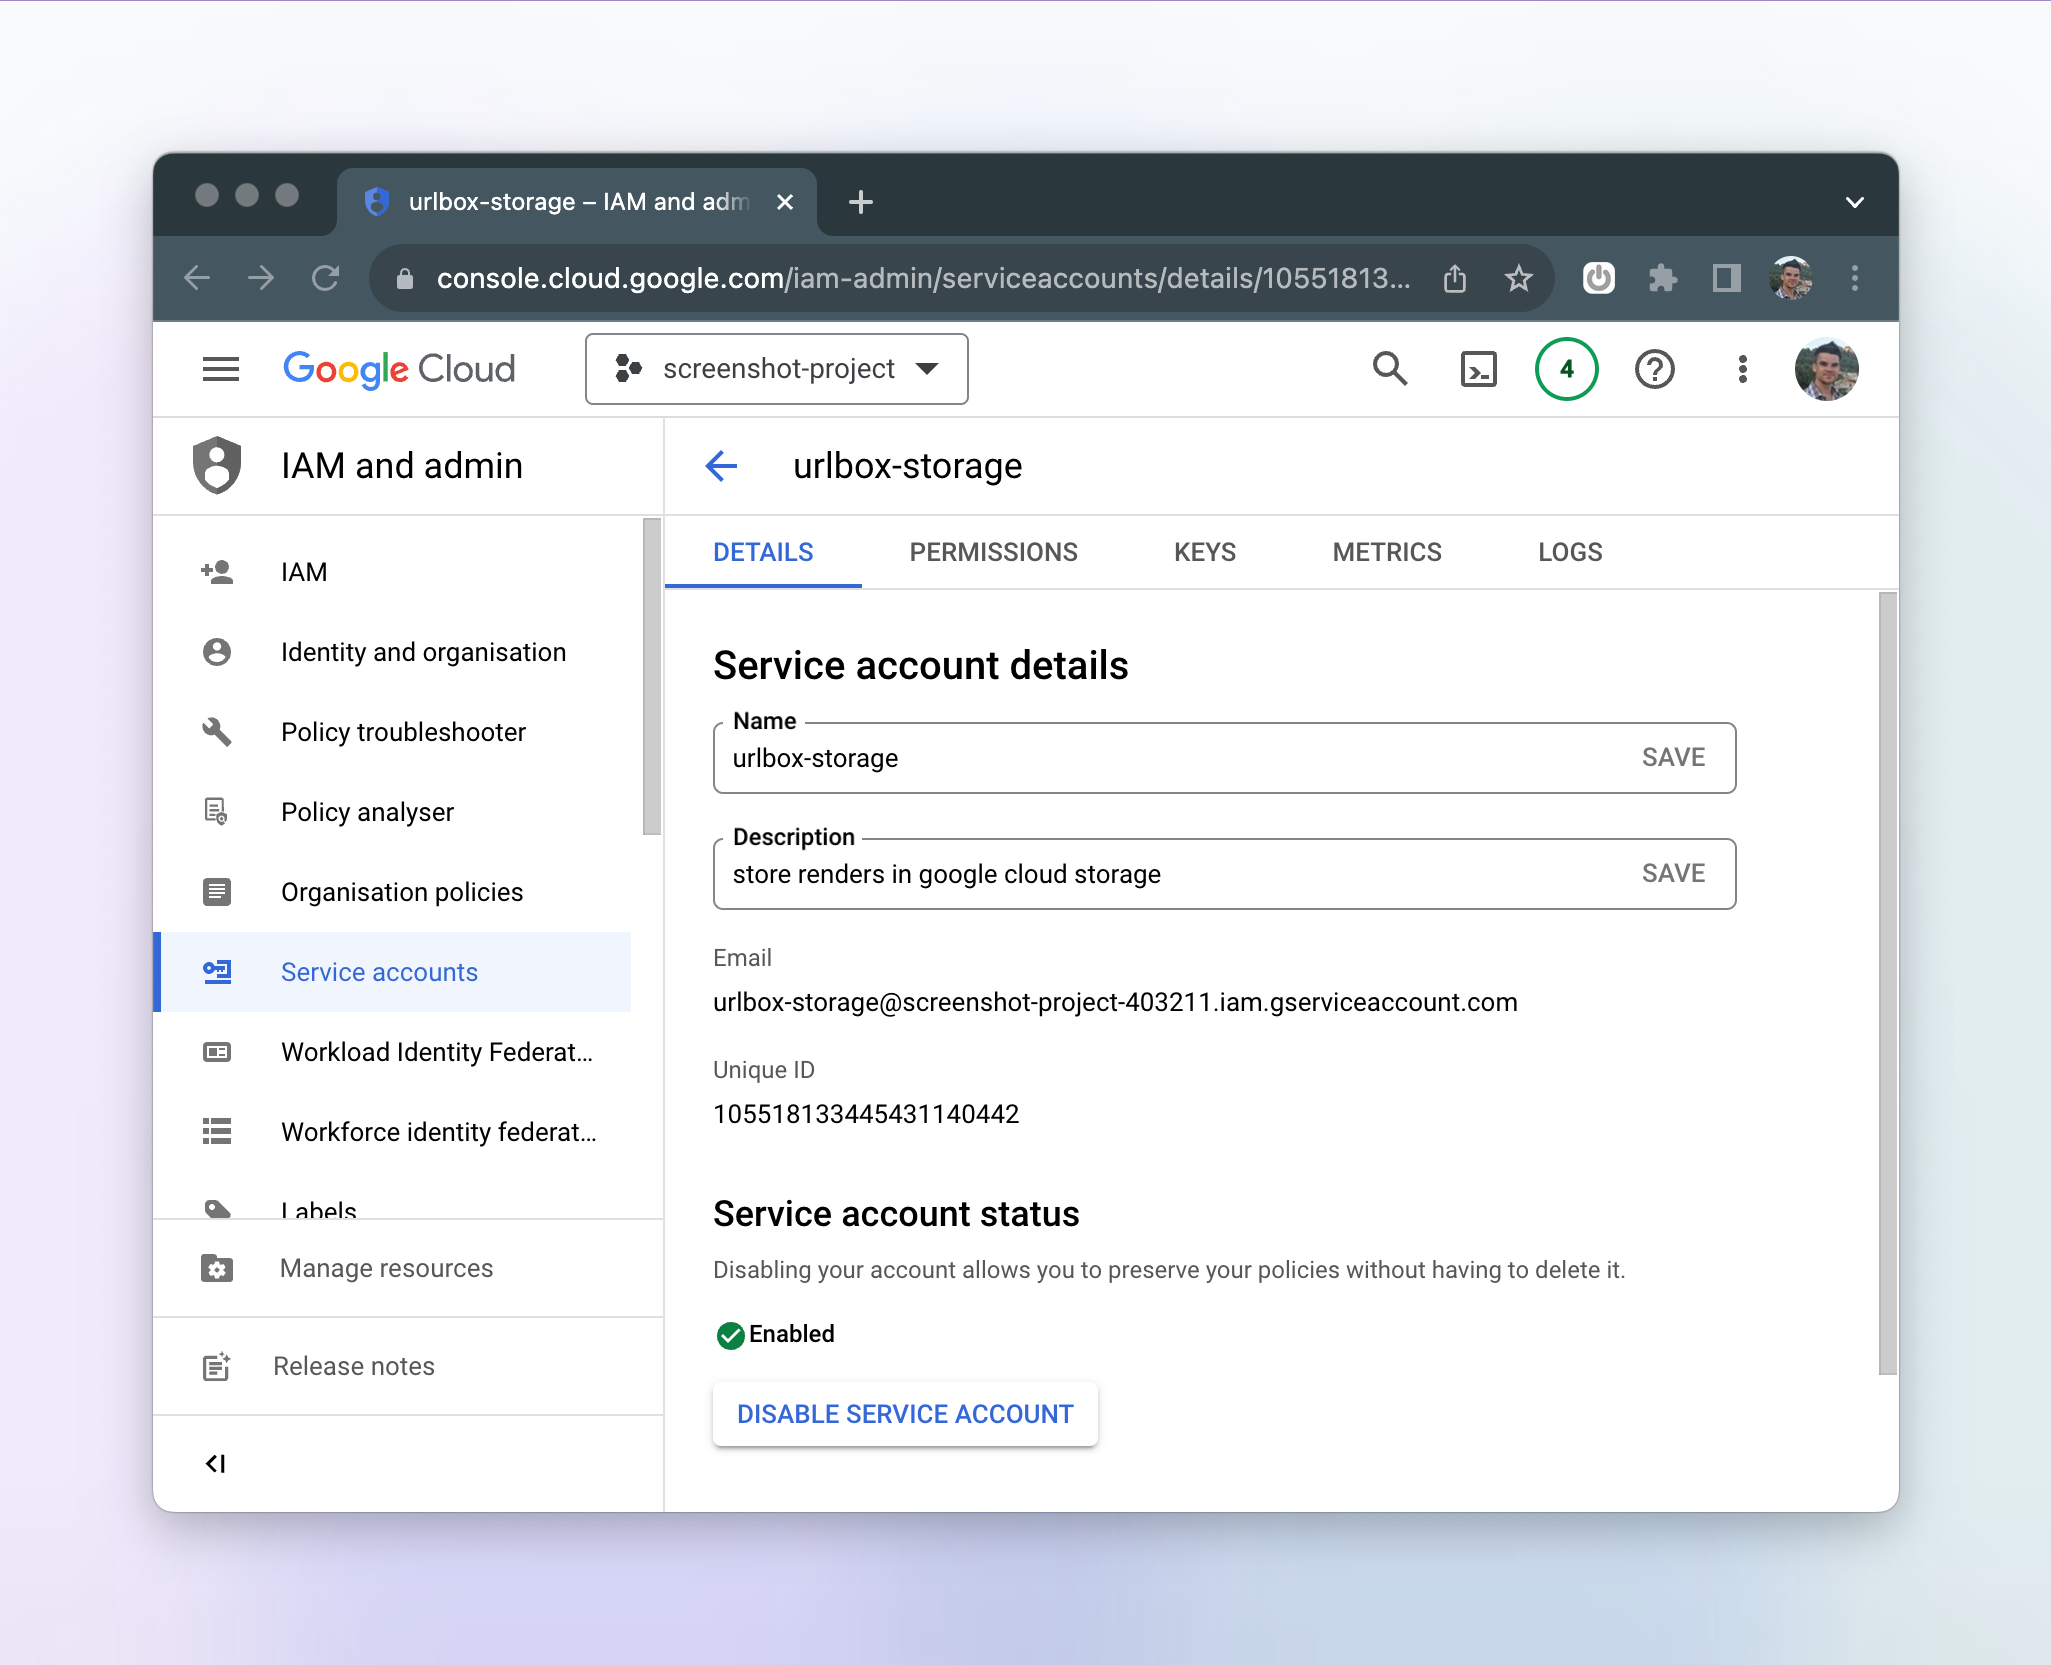
Copy the email address of the service account as we will need that in the next step.
Grant the service account access to your bucket
Go back to the bucket you created, and click the Permission tab. Then click Grant Access. In the popup form, paste the service account's email address into the New principals.
Under Assign Roles, make sure to assign the Storage Object Admin role which you'll find inside the Cloud Storage service to the service account.
Why Storage Object Admin and not just Storage Object Creator? Because Urlbox sometimes needs to be able to overwrite existing files in your bucket, and the Storage Object Creator role does not allow this. You can select Storage Object Creator if you prefer, but you will get an error when saving a render if the file already exists in your bucket.
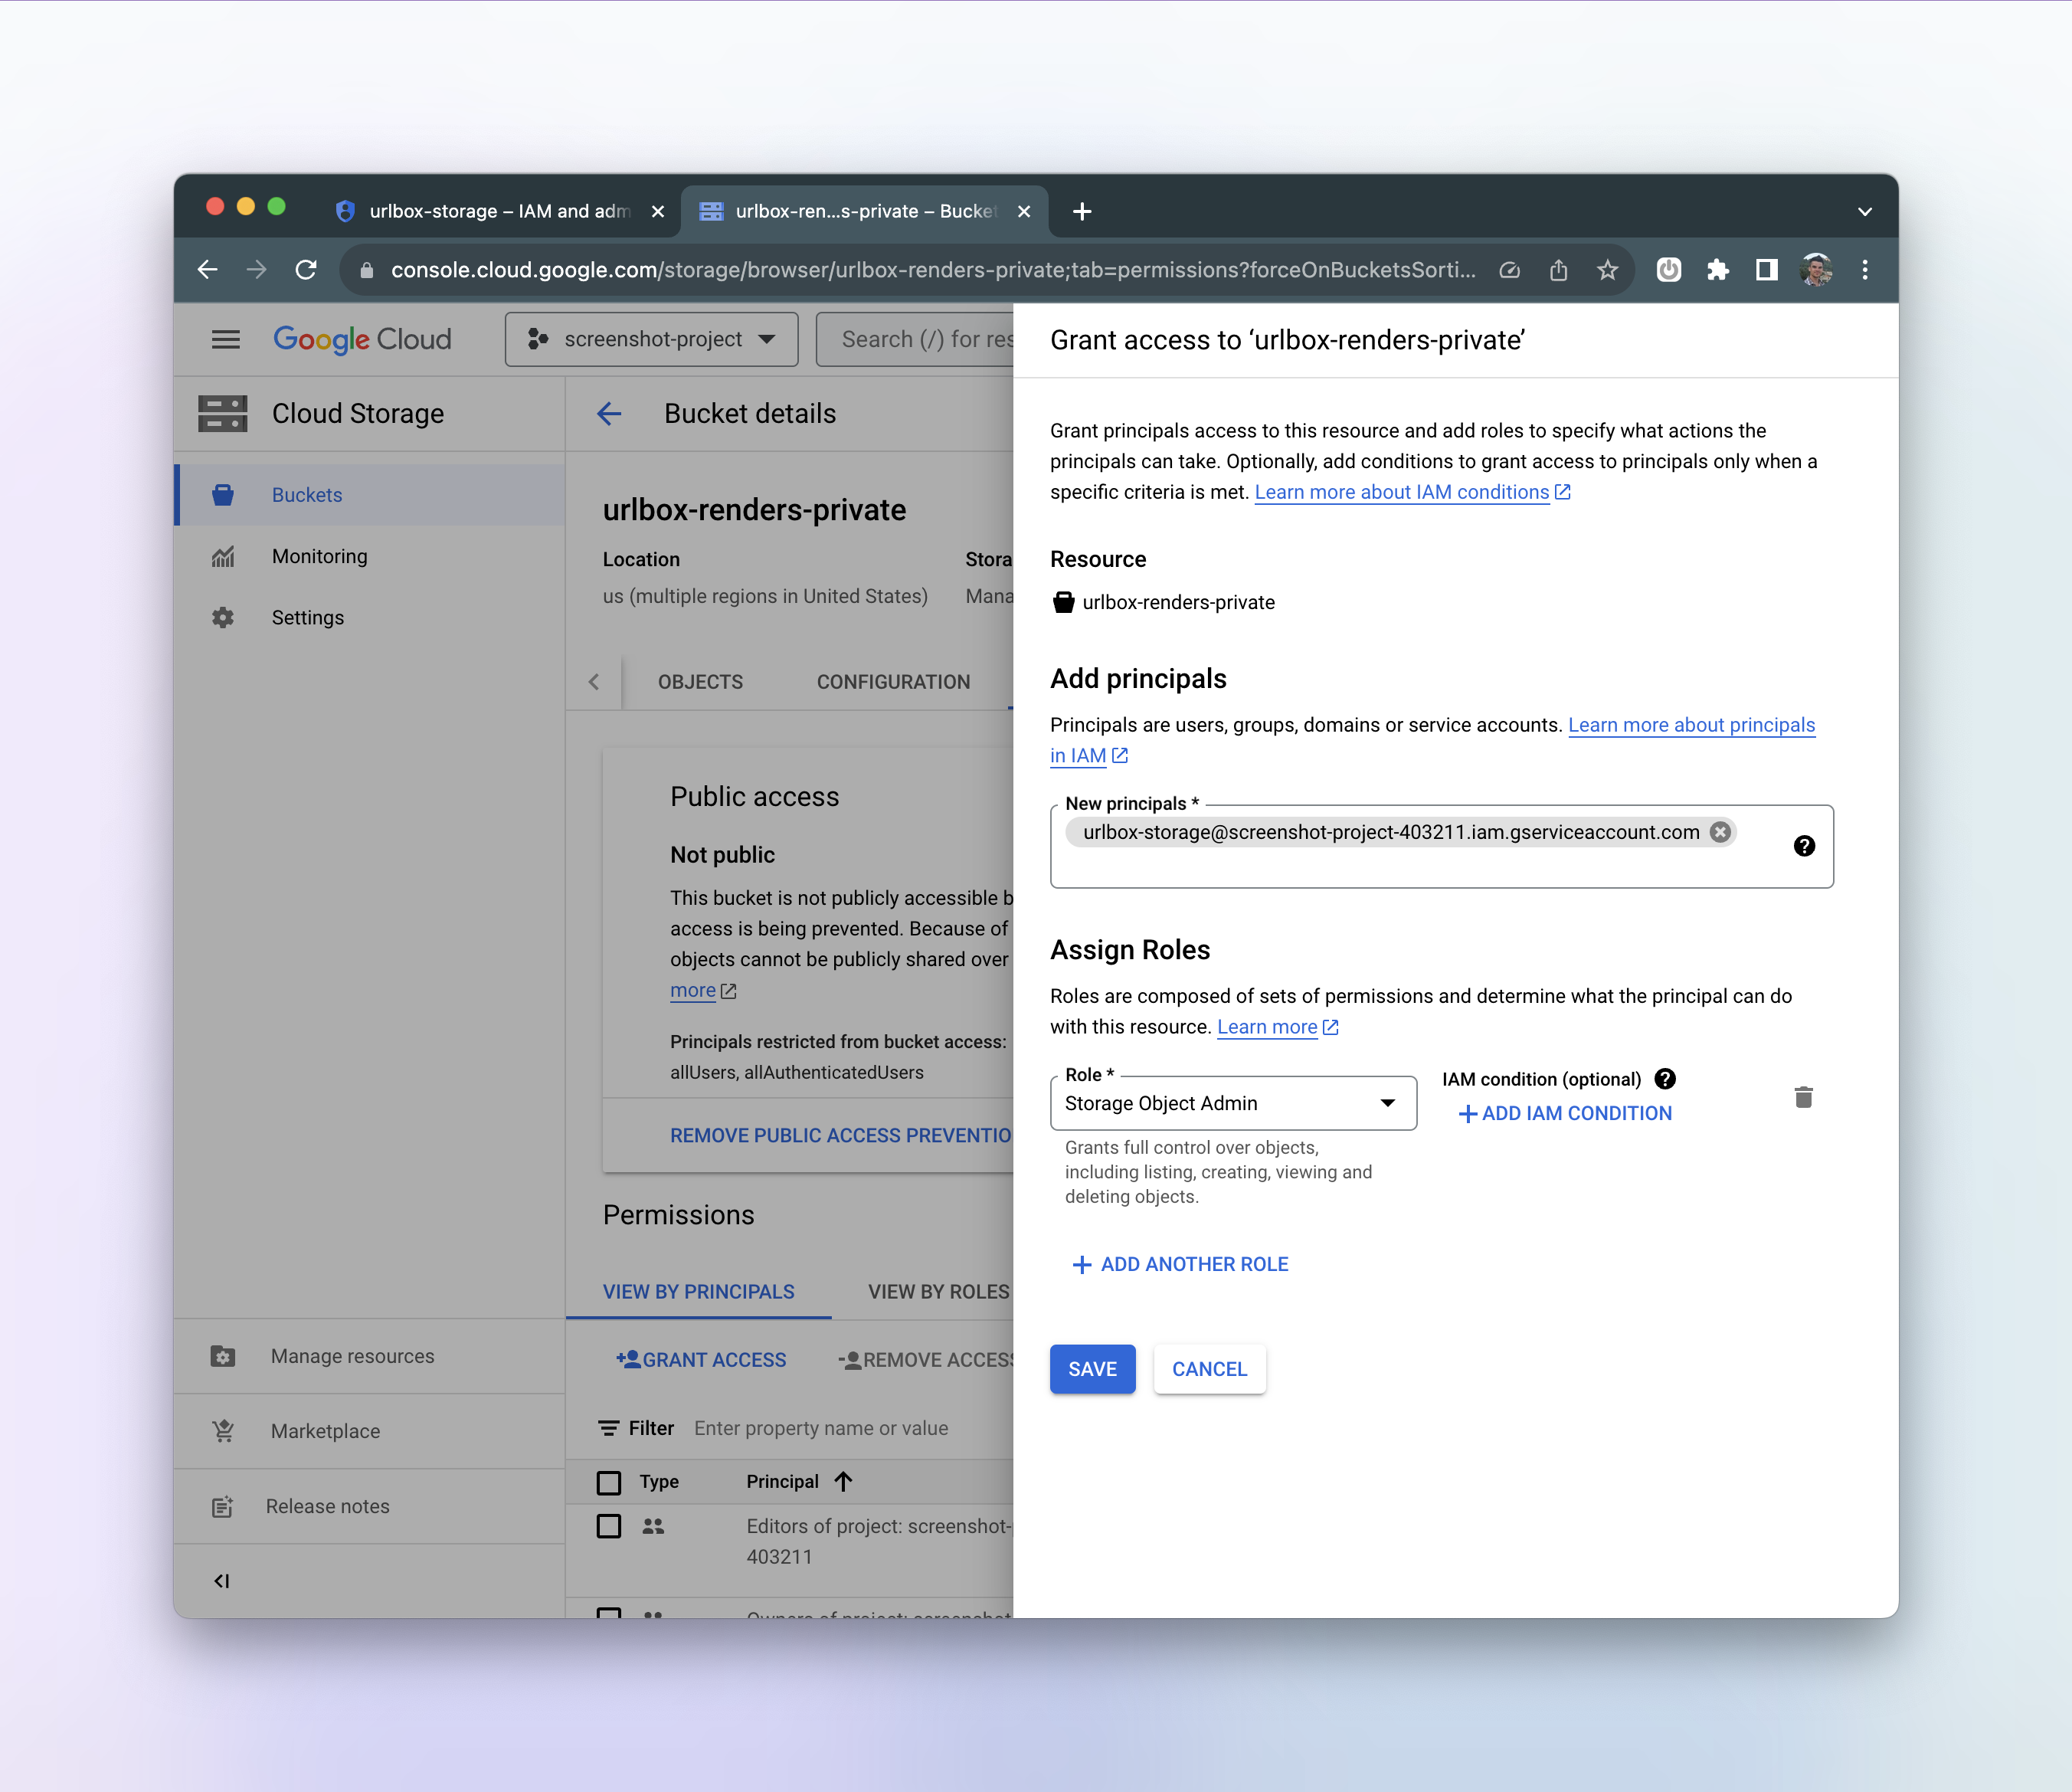
Then click Save.
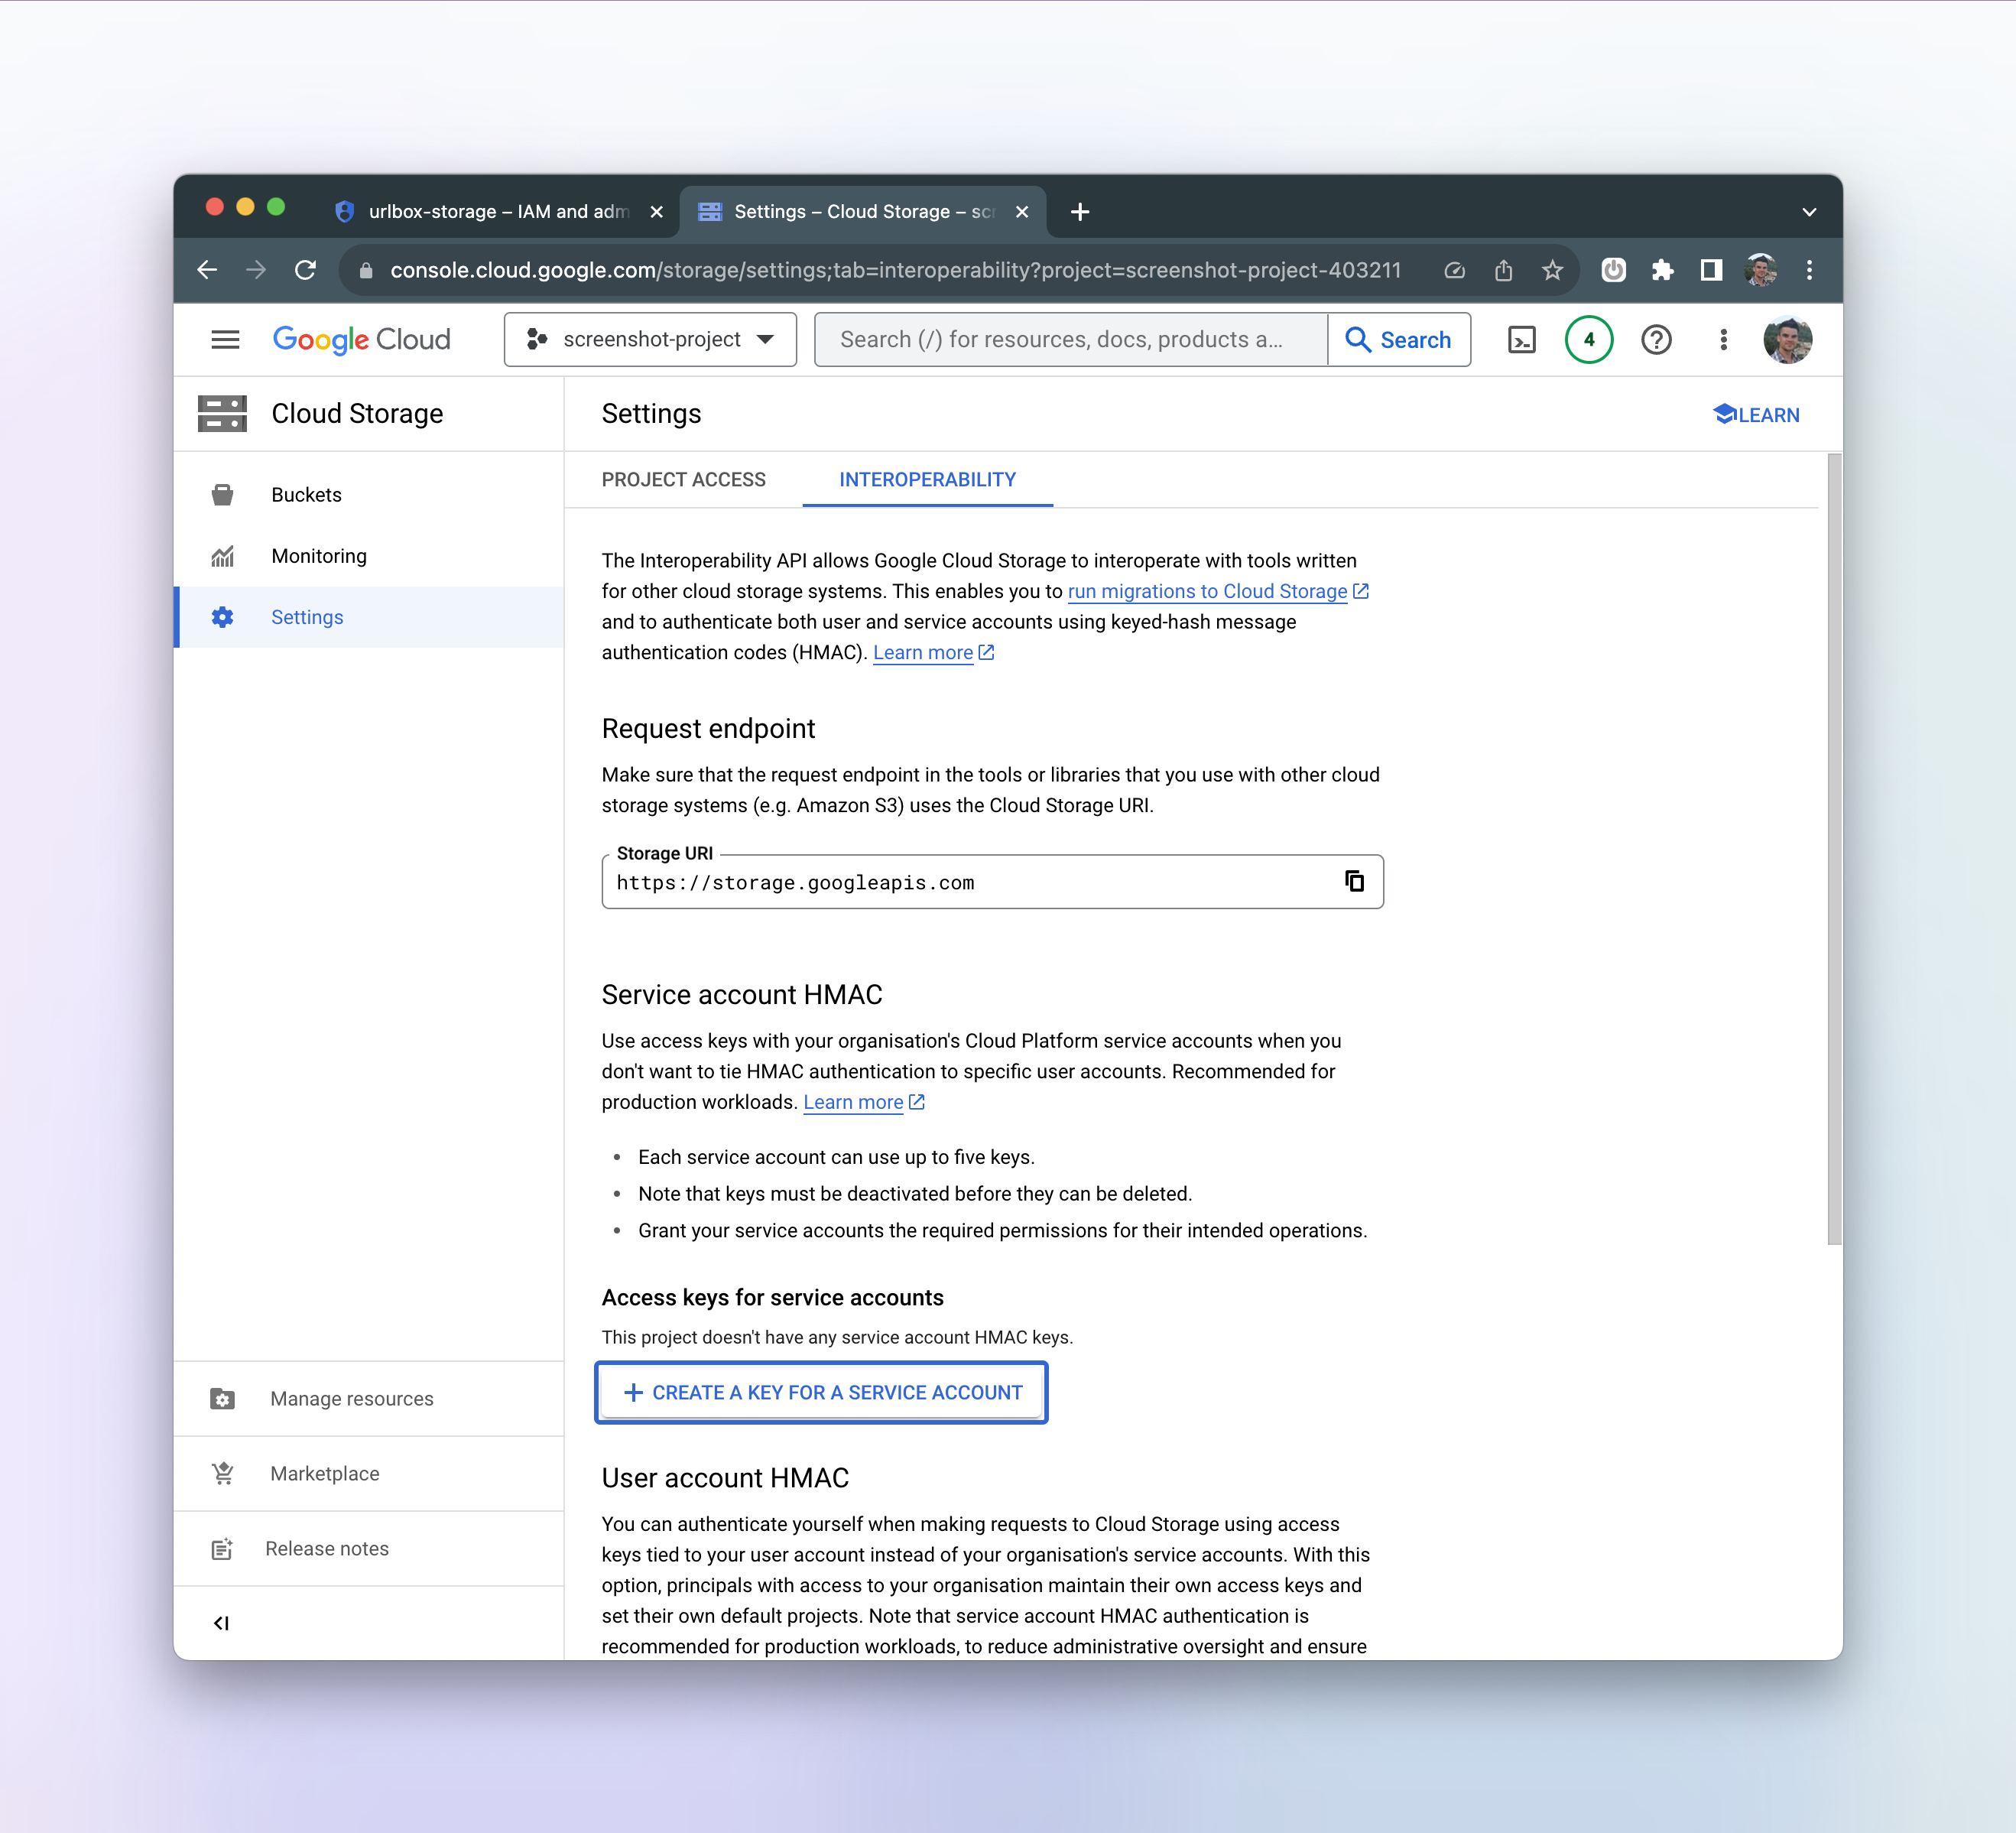
Create credentials for your service account
The next step is to generate HMAC credentials for your service account.
To do this, go to the Cloud Storage > Settings page. Then select the Interoperability tab and click Create a key for a service account.
In the popup form, select the service account you created earlier, and click Create Key.
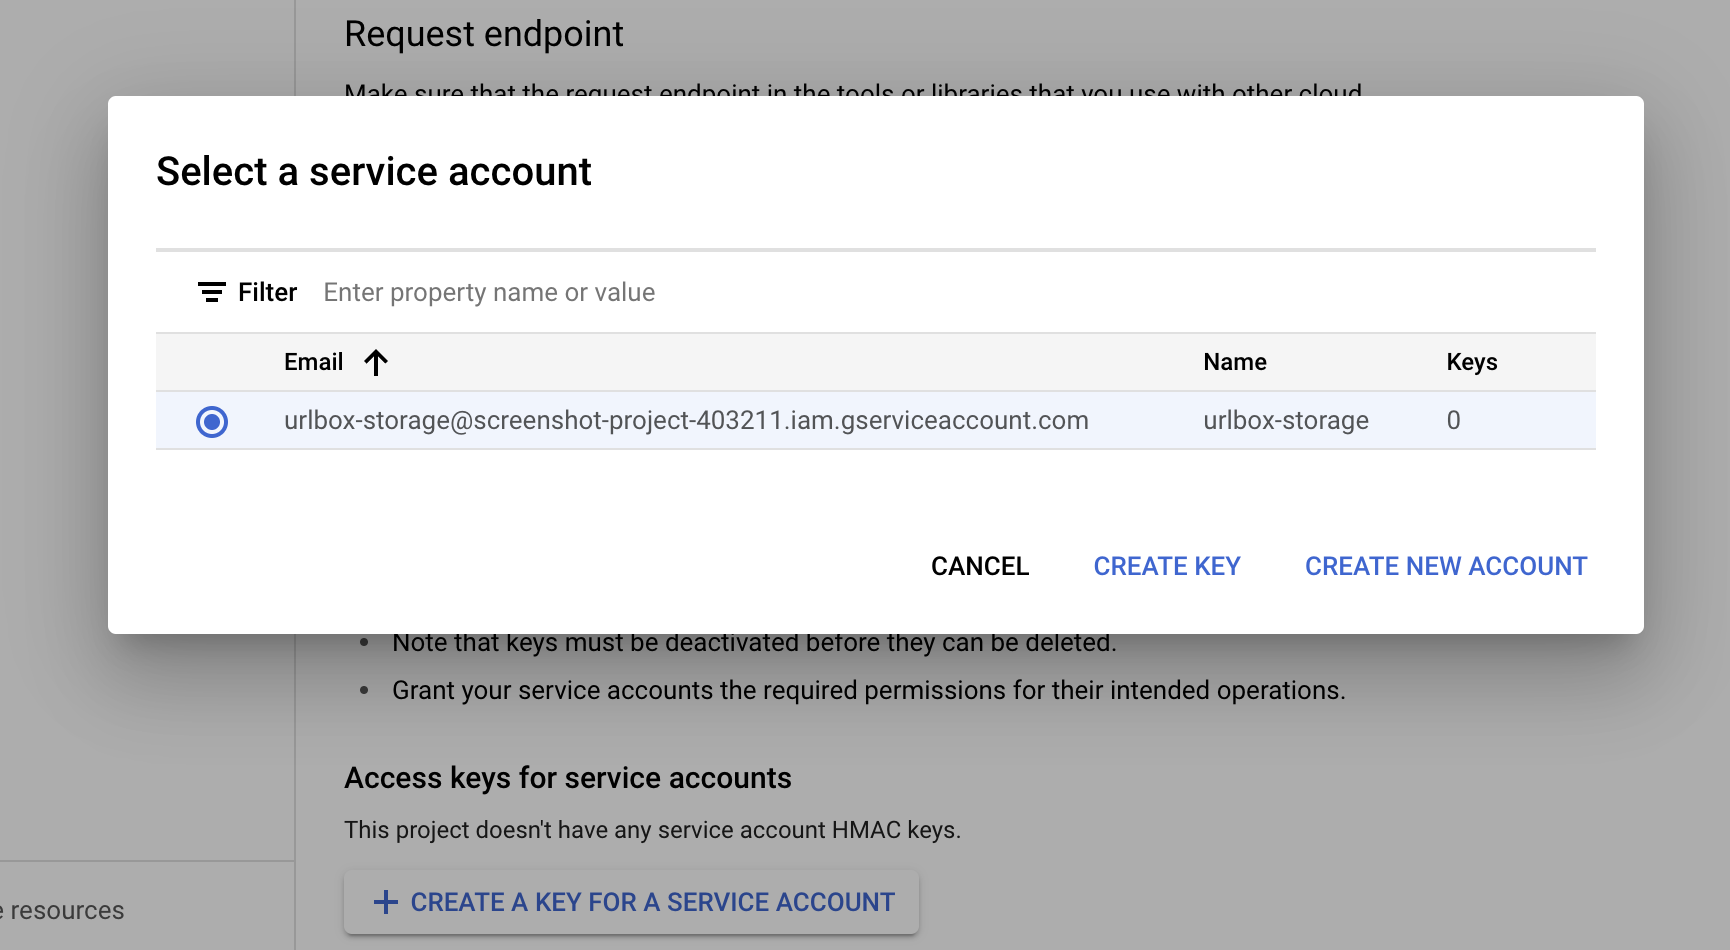
Now you should note down both the Access key and secret so we can add them to the Urlbox config.
Add the service account credentials to Urlbox
Now we can go back to the Urlbox dashboard.
From within the project settings page, scroll down to the S3 Configuration section and click the Add S3 Config button.
Use the following settings:
- Access Key: The access key from the service account credentials
- Secret: The secret key from the service account credentials
- Bucket Name: The name of the bucket you created earlier
- Private Bucket: Checked
- Region: Set this to
auto. - Endpoint URL:
https://storage.googleapis.com.
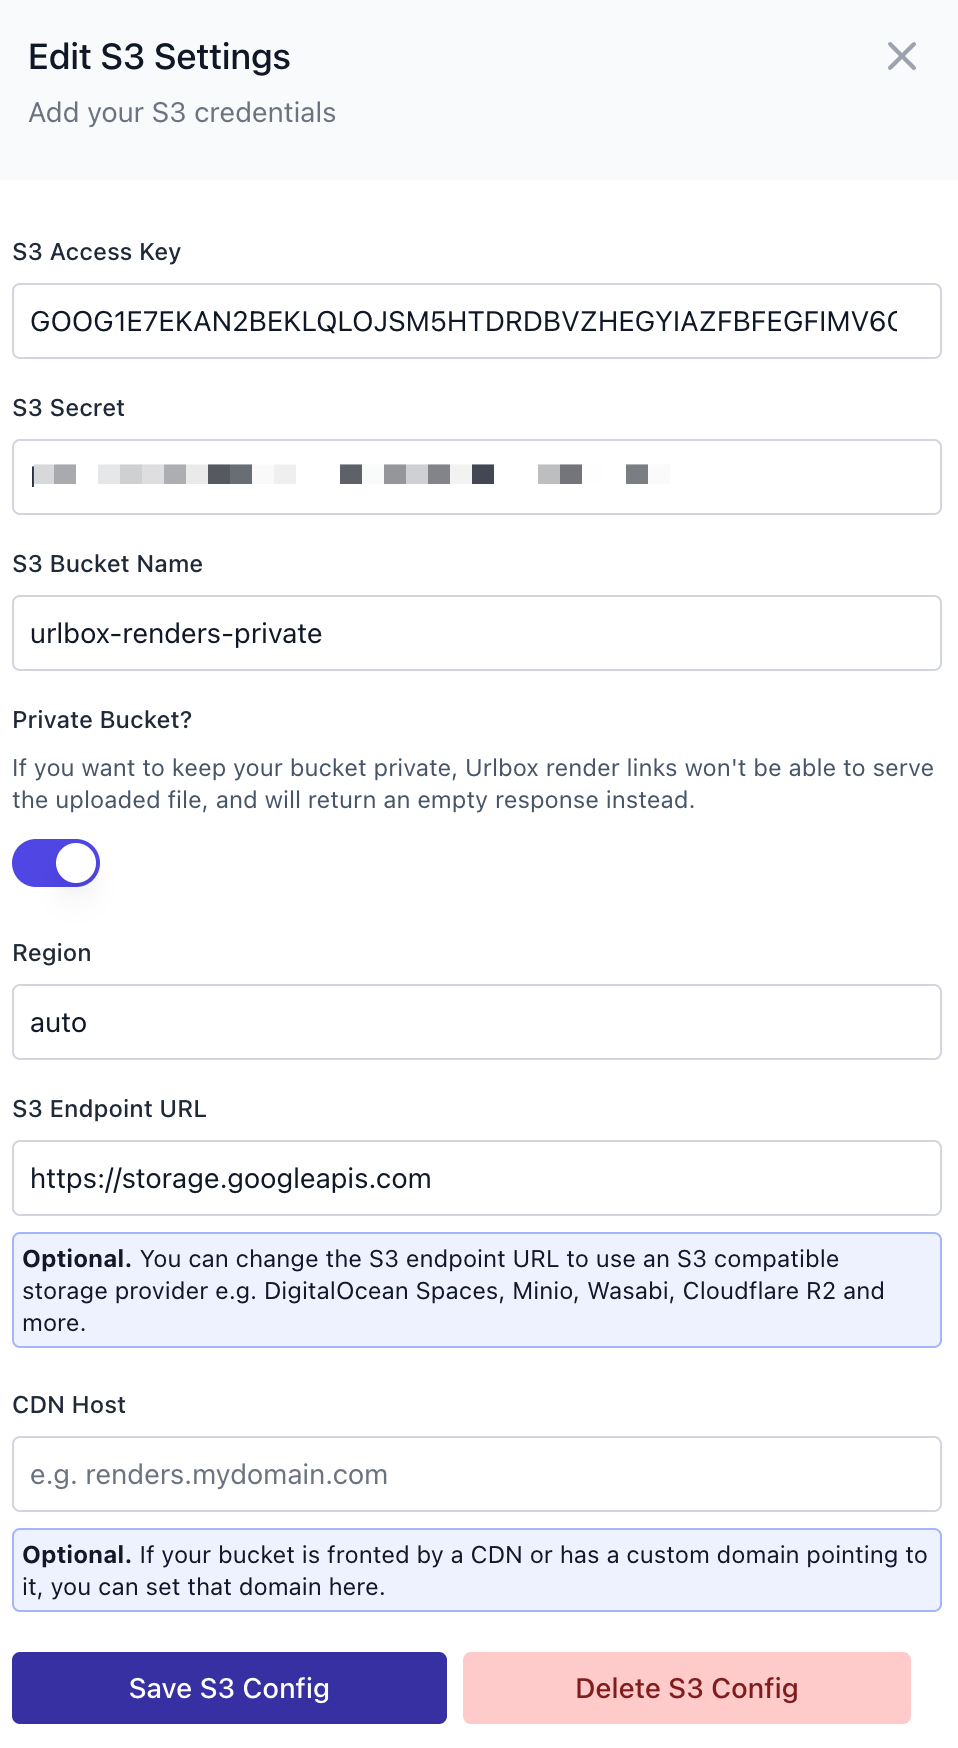
Then click Save S3 Config, and if everything is configured correctly, the form should disappear and you should see a success message.
When you click Save S3 Config on the form, we will attempt to upload a file to your bucket at urlbox_test/deleteme.txt to ensure that the credentials are correct.
If there is an error uploading the test file to your bucket, we will show the error as it appears from Google Cloud. Please ensure you have followed all the steps above correctly to ensure the settings are correct. Check the permissions tab of your bucket settings to ensure that the correct service account has access, and has the Storage Object Admin role.
Start saving screenshots to your S3 bucket
Now that your GCS bucket is configured correctly, you can start saving screenshots to it.
You can do this by setting the use_s3 option to true in your API request.
Please note that because the bucket doesn't have public access, urlbox cannot serve the renders directly from your bucket, in order to configure public access, see the next section.
To see the options that configure how renders are saved to your GCS bucket, please see the saving to s3 compatible storage guide.
Using a public GCS bucket
If you prefer Urlbox to serve the renders from your GCS bucket, you can make your bucket public and expose its contents directly to the Internet.
There are two steps to enable public access on your bucket:
-
Go back to the bucket settings page in Google Cloud. Then click the
Permissionstab and disable public access prevention by clicking on theRemove Public Access Preventionbutton. ClickConfirmon the warning popup. -
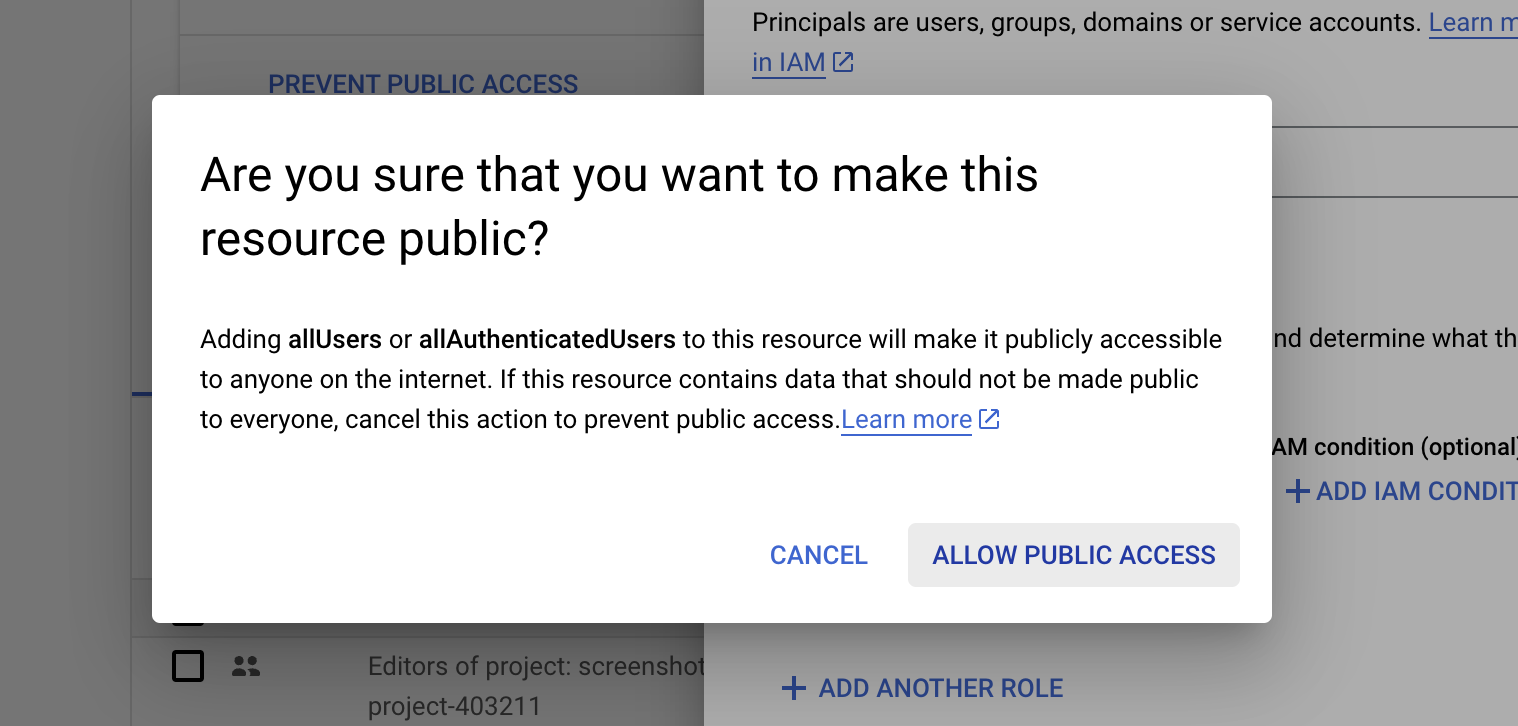
Also in the permissions tab, click
Grant Accessand then add the principleallUsersand assign theStorage Object Viewerrole to it. ClickSaveand thenAllow Public Accessin the warning popup.

Over in the Urlbox S3 settings panel, uncheck the Private Bucket setting, and re-save. If everything is working, the form should disappear and you should see a success message.
Now when you request a screenshot with use_s3 set to true, the screenshot will be saved to your bucket and can also be served from there.
