Configuring Cloudflare R2
Save your screenshots, PDFs and other renders to a Cloudflare R2 bucket from Urlbox
This guide will walkthough the process of configuring Cloudflare R2 so that you can store screenshots and other renders directly to your Cloudflare R2 bucket.
Create R2 Bucket
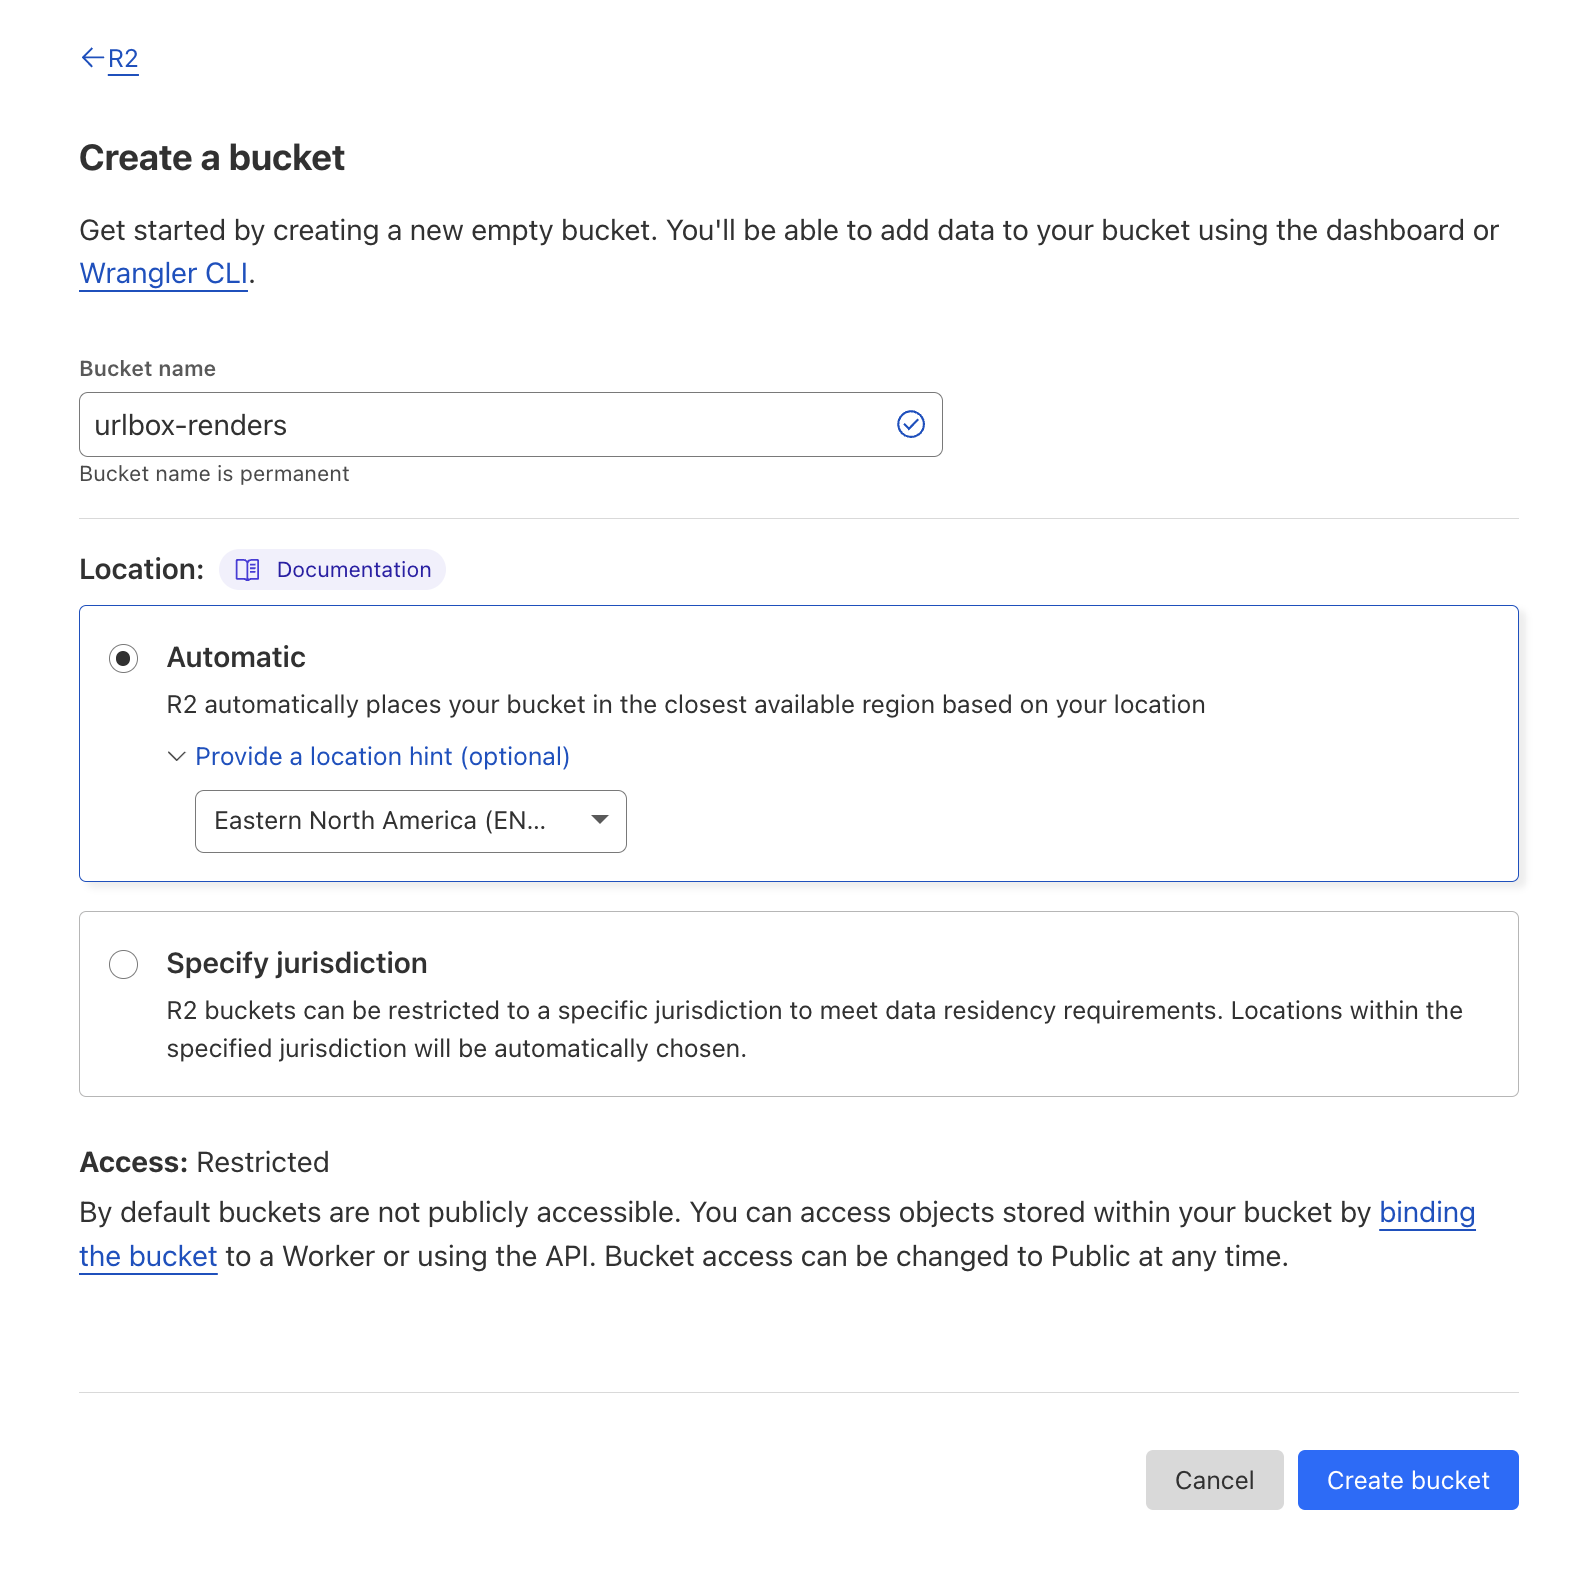
Log in to your Cloudflare account and head to the R2 section from the sidebar. Click the Create Bucket button and fill out the form.
For this guide we'll call the bucket urlbox-renders and optionally give a location hint of Eastern North America. The location should be closest to where you expect most of your users to be located.
Now click the Create Bucket button to create the bucket.
Get the S3 Endpoint for your R2 bucket
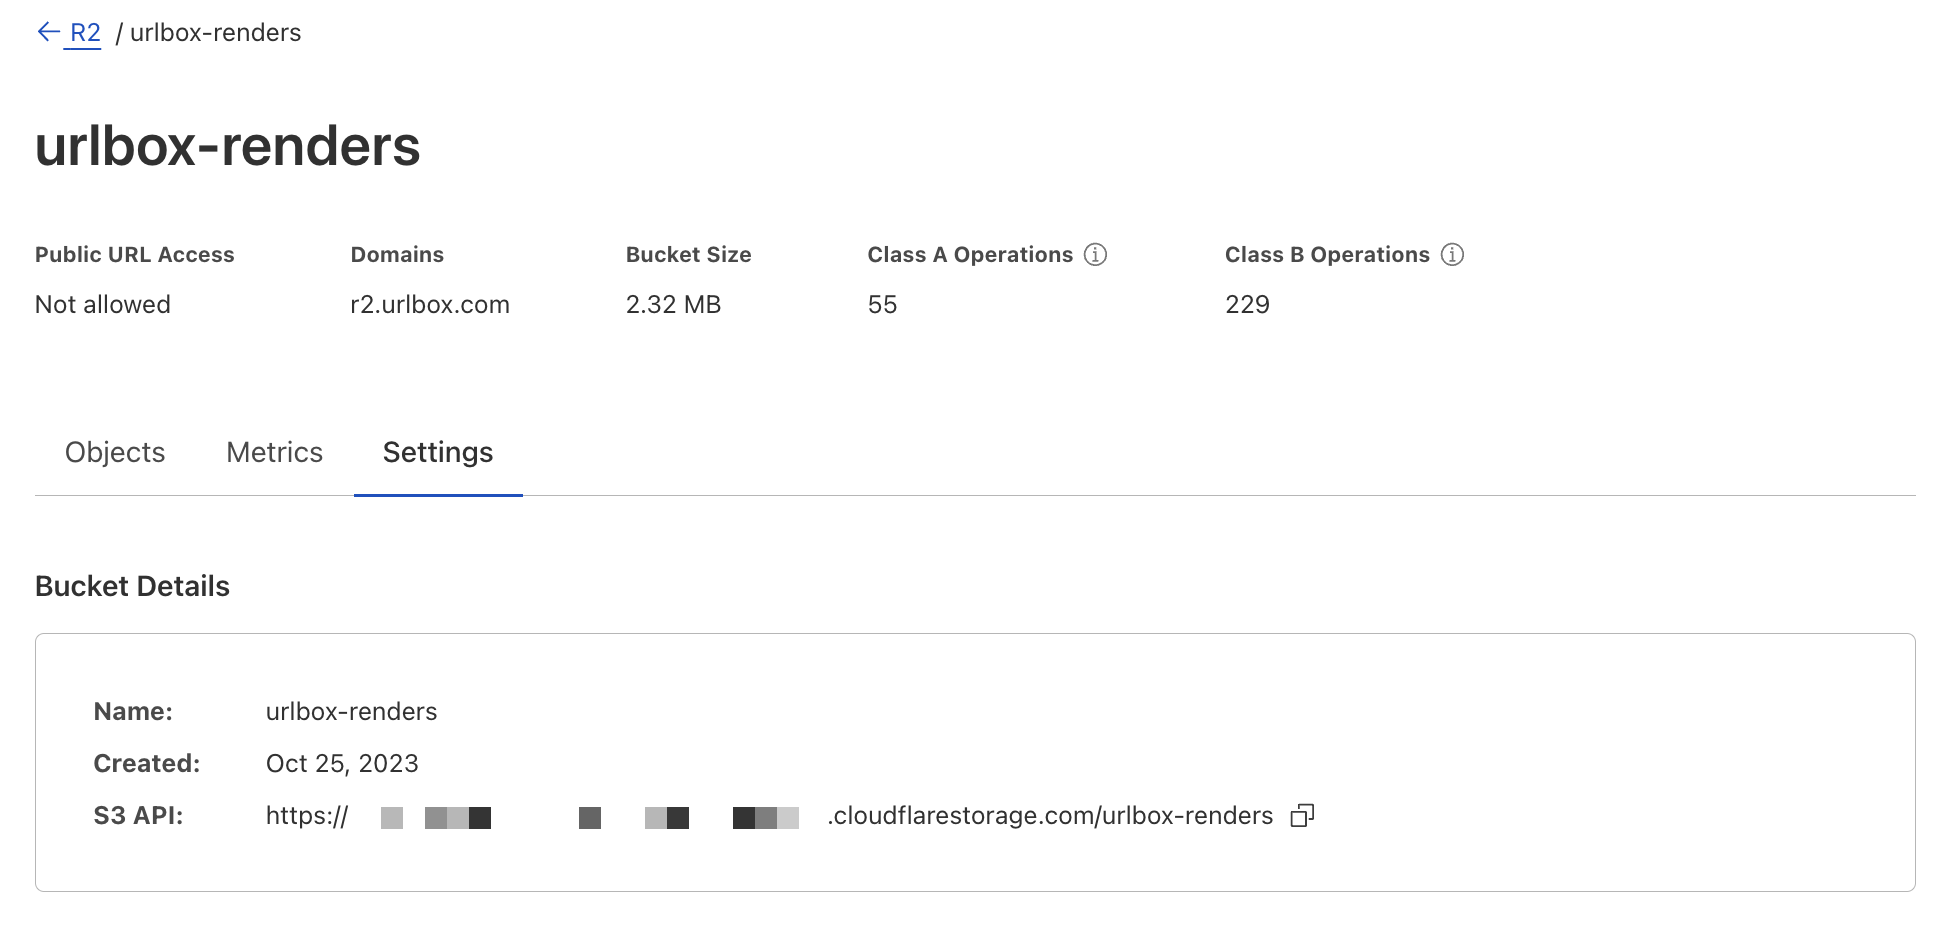
Once the bucket has been created, click on the settings tab to access the bucket settings.
You should see a section called Bucket Details which contains an S3 API URL.
This URL, minus the bucket name, will become the S3 endpoint that we will use later when adding the config to your Urlbox project.
It should be of the form: https://<ACCOUNT_ID>.r2.cloudflarestorage.com/<bucket_name>, where ACCOUNT_ID is your Cloudflare account id.
The endpoint URL we will use is actually just https://<ACCOUNT_ID>.r2.cloudflarestorage.com.
Create an R2 Token
In your Cloudflare account, go back to the R2 home screen again and click the Manage R2 API Tokens in the right hand sidebar.
Then click the Create API token button.
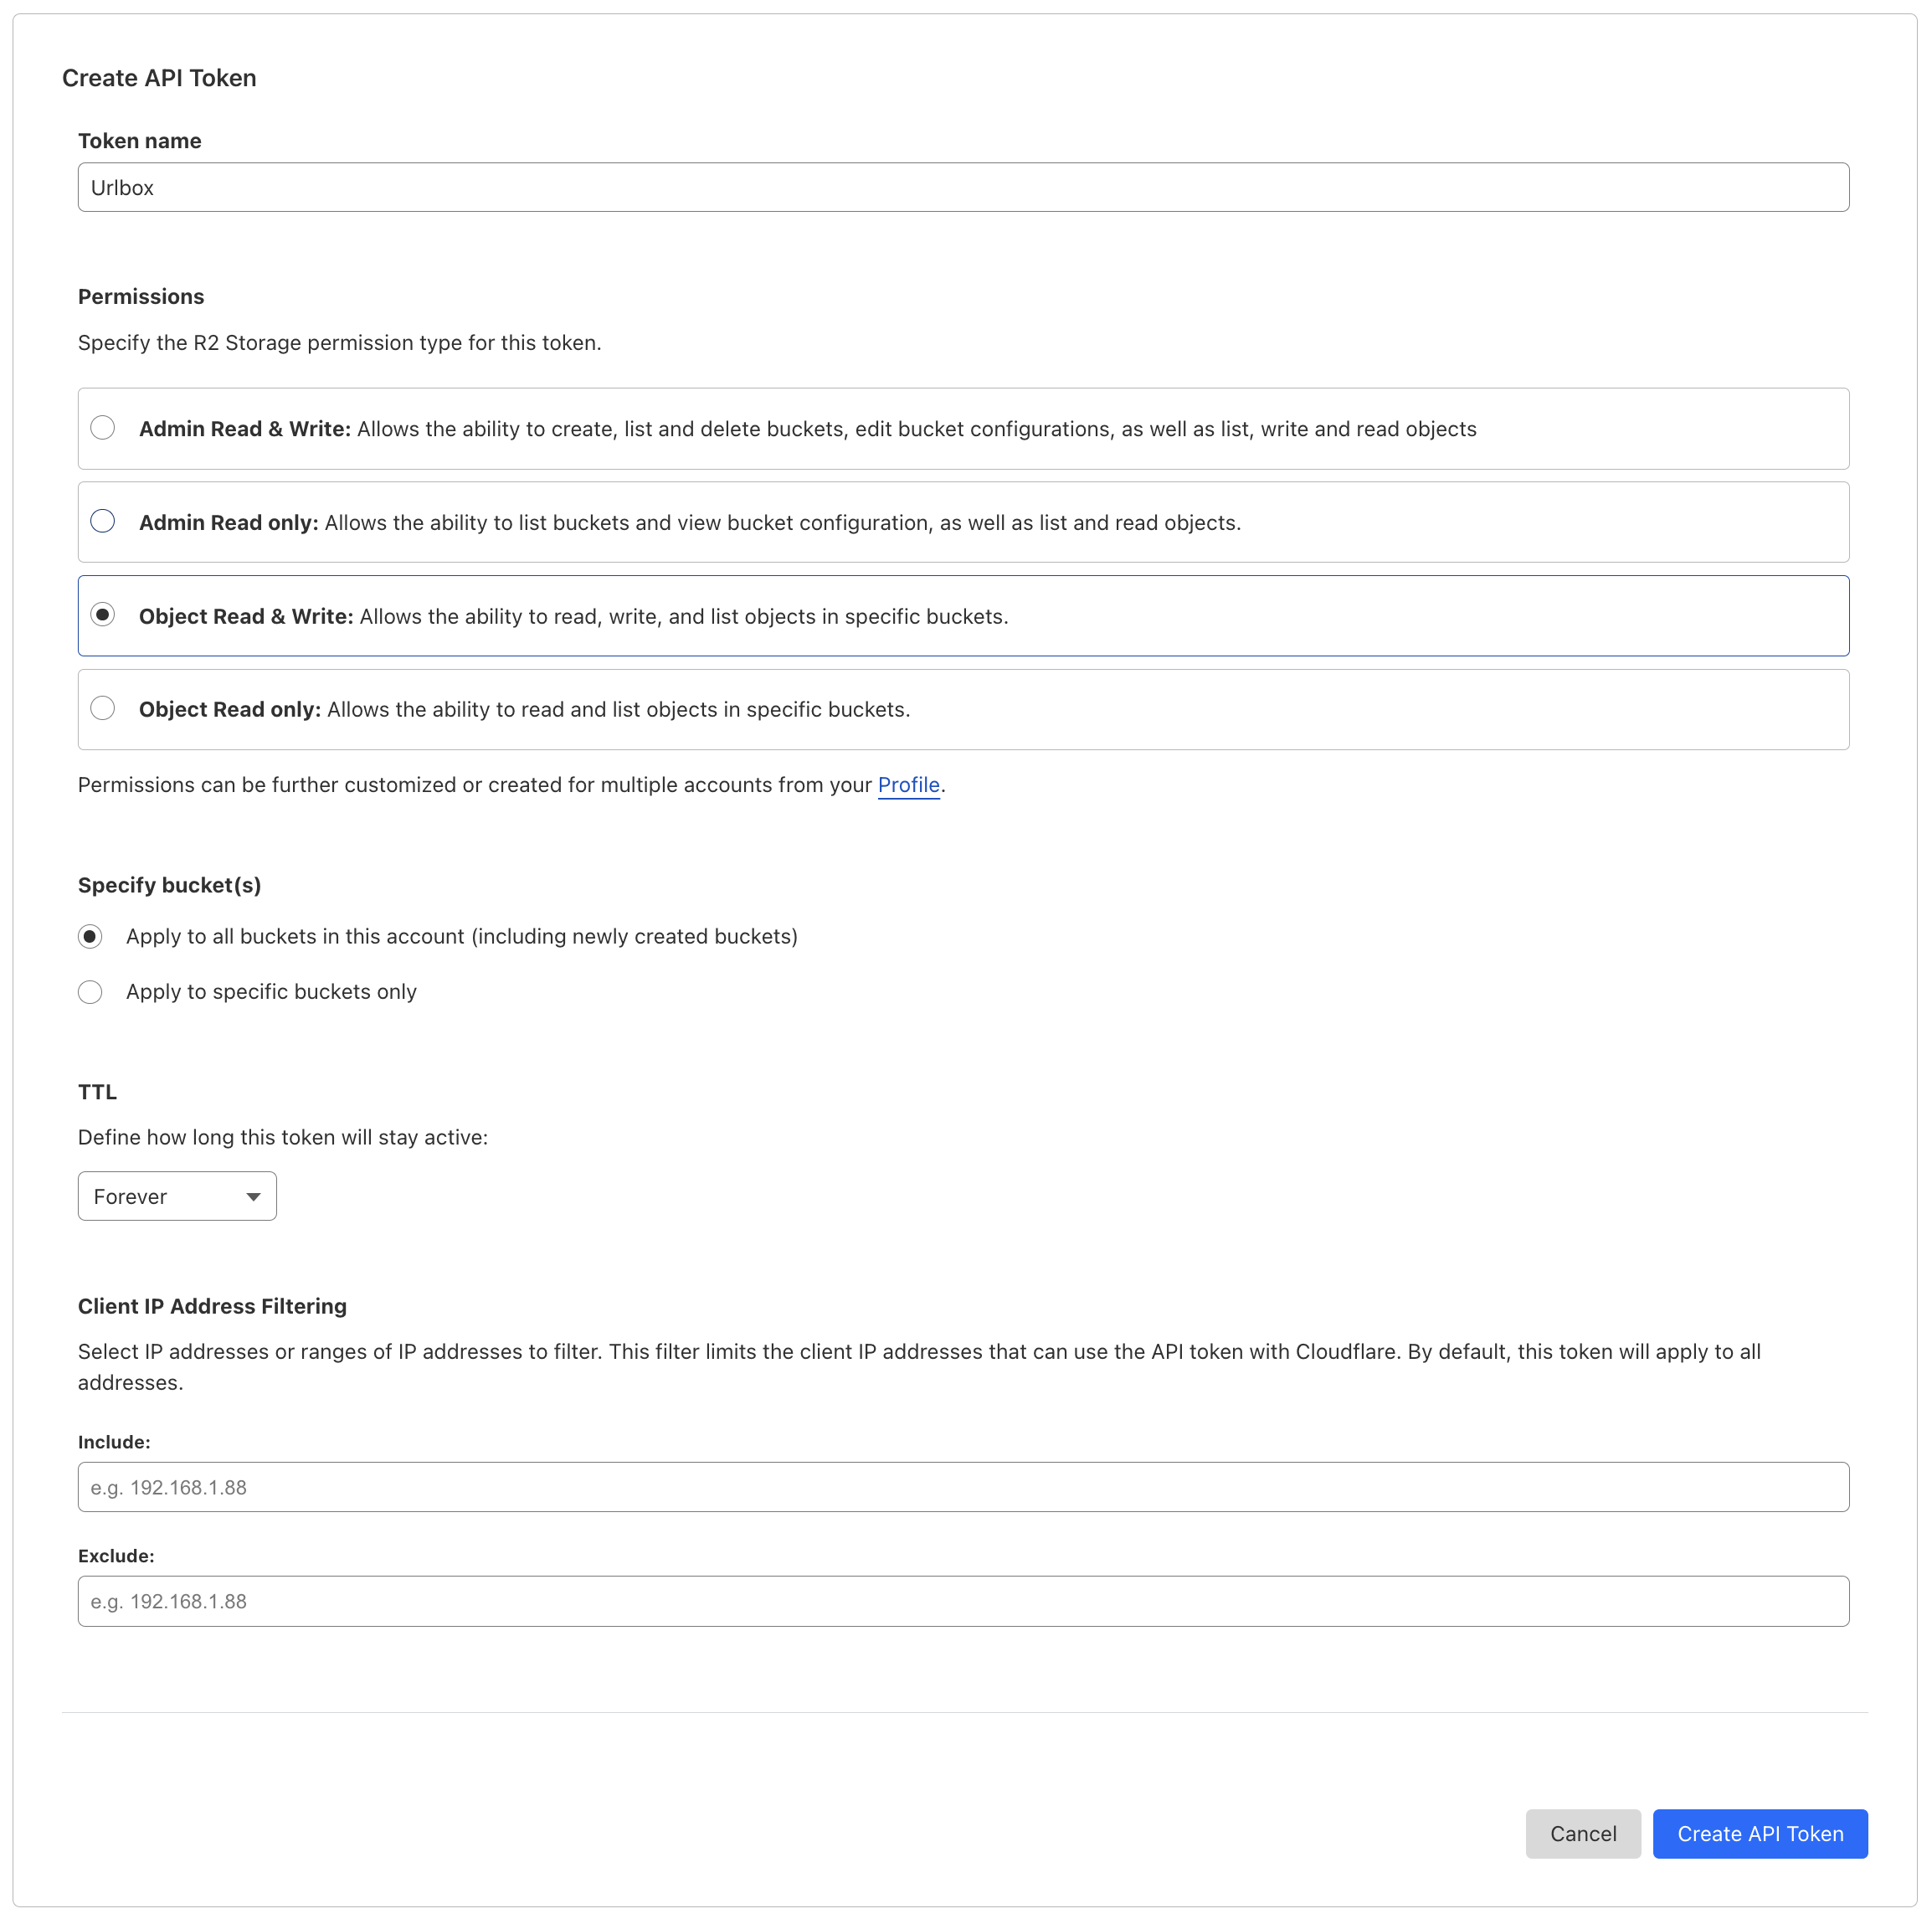
Give the token a name, something like Urlbox should do.
In the permissions, you'll need to give Object Read & Write access, so that Urlbox can write, i.e. upload the renders to your R2 bucket.
Under specify buckets, you can choose whether this token has access to all buckets, or just a specific bucket.
Under TTL, you can specify how long the token should be valid for until it expires. For simplicity we'll set it to Forever, but you may want to use a shorter expiry and figure out a way to rotate the R2 token when it expires.
Now that you've filled out all the settings, click the Create API Token button to create the token.
On the following page, you'll see the token that you just created.
At the bottom of the page, it will show you the access key and secret key credentials for S3 clients, which is what we're after.
Copy and paste them to a safe place, as you won't be able to see them again.
Adding the R2 credentials to Urlbox
Now we can go back to the Urlbox dashboard.
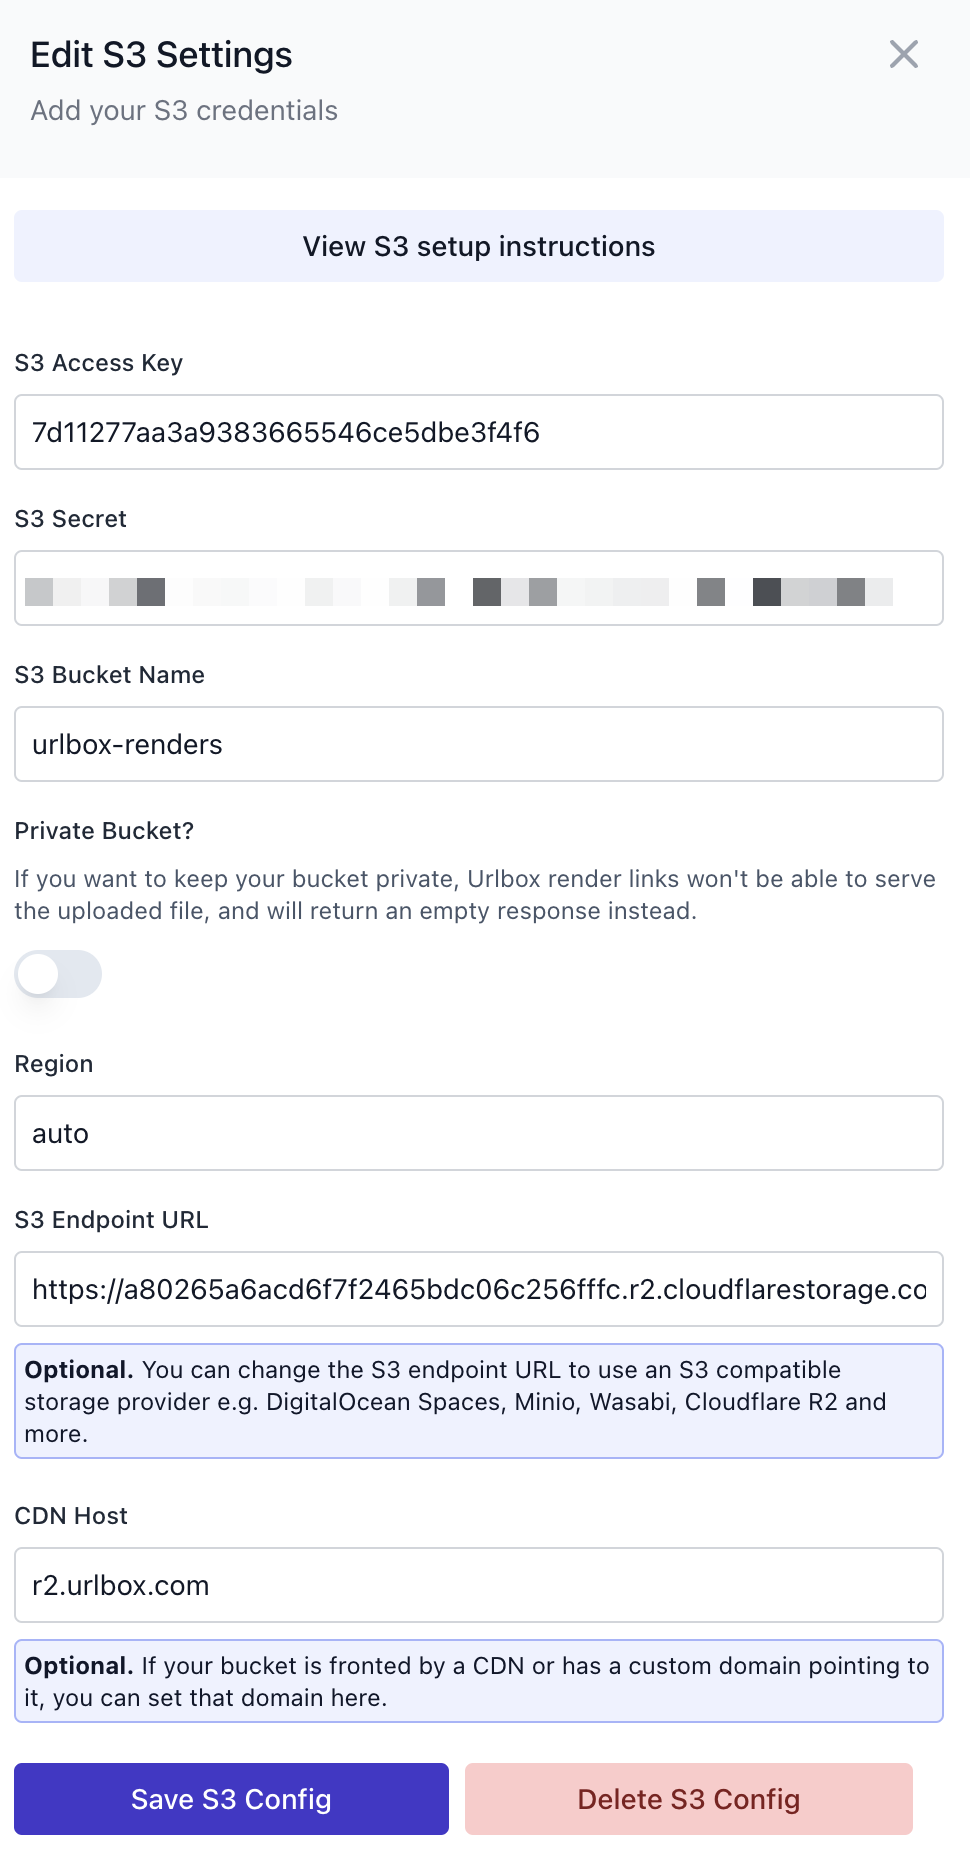
From within the project settings page, scroll down to the S3 Configuration section and click the Add S3 Config button.
We can copy the access key and secret key from our R2 token into the S3 config form.
We should also add the bucket name as urlbox-renders (or whatever you named your bucket) and we set the region to auto. us-east-1 should also work, according to the cloudflare R2 docs.
By default, the cloudflare bucket is created with restricted access, so we need to check the Private Bucket option. This will mean that Urlbox will only be able to store the renders in the bucket, but is not able to serve them. See the next section if you want Urlbox to be able to serve the files from your bucket.
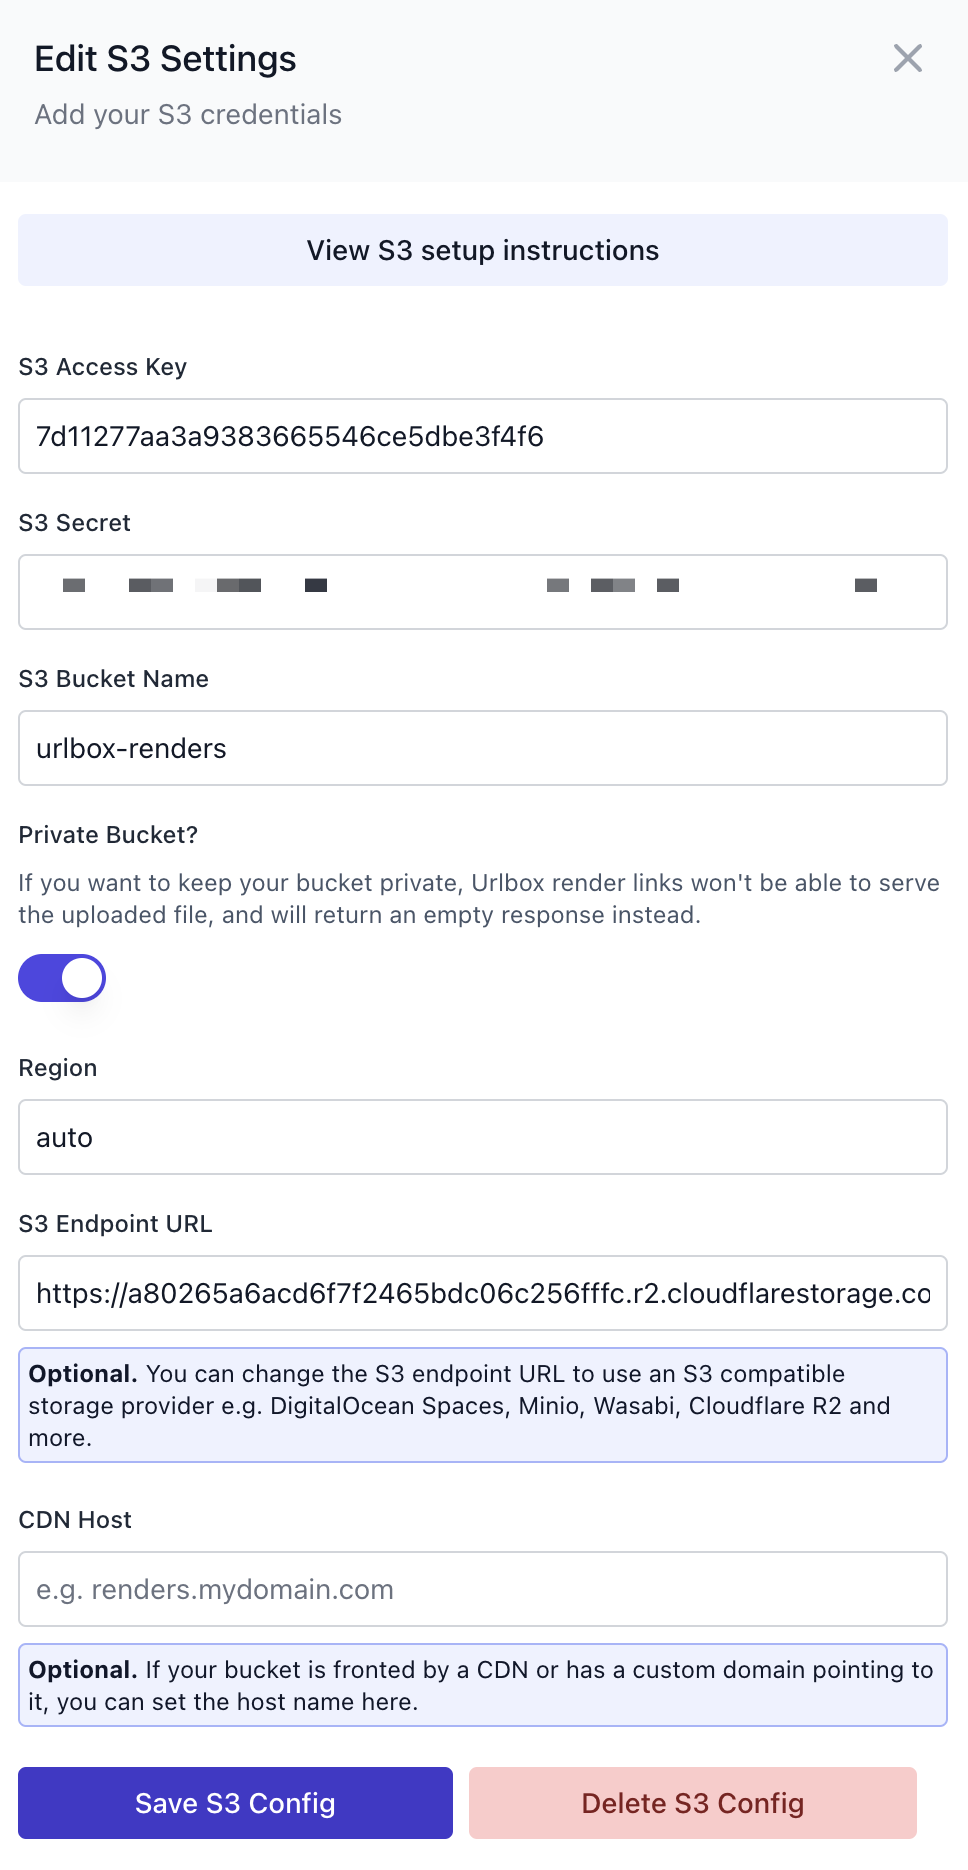
We also need to set the S3 endpoint to the one that we copied from the R2 bucket settings page, it should look something like:
https://<ACCOUNT_ID>.r2.cloudflarestorage.com, note that it does not include the bucket name.
Then click Save S3 Config, and if everything is configured correctly, the form should disappear and you should see a success message.
When you click Save S3 Config on the form, Urlbox will attempt to upload a file to your bucket at urlbox_test/deleteme.txt to ensure that the credentials are correct.
Because Urlbox does not have delete credentials on your bucket, this file will remain in your bucket and you can delete it once the bucket is configured correctly.
Using a public R2 bucket
If you prefer Urlbox to serve the renders from your R2 bucket, you can make your bucket public and expose its contents directly to the Internet. See public R2 buckets documentation on Cloudflare for more info on how to configure this.
The best way to configure a public R2 bucket is to connect your bucket to a custom domain. For example, if your main domain is mydomain.com, you could connect your bucket to a subdomain such as renders.mydomain.com.
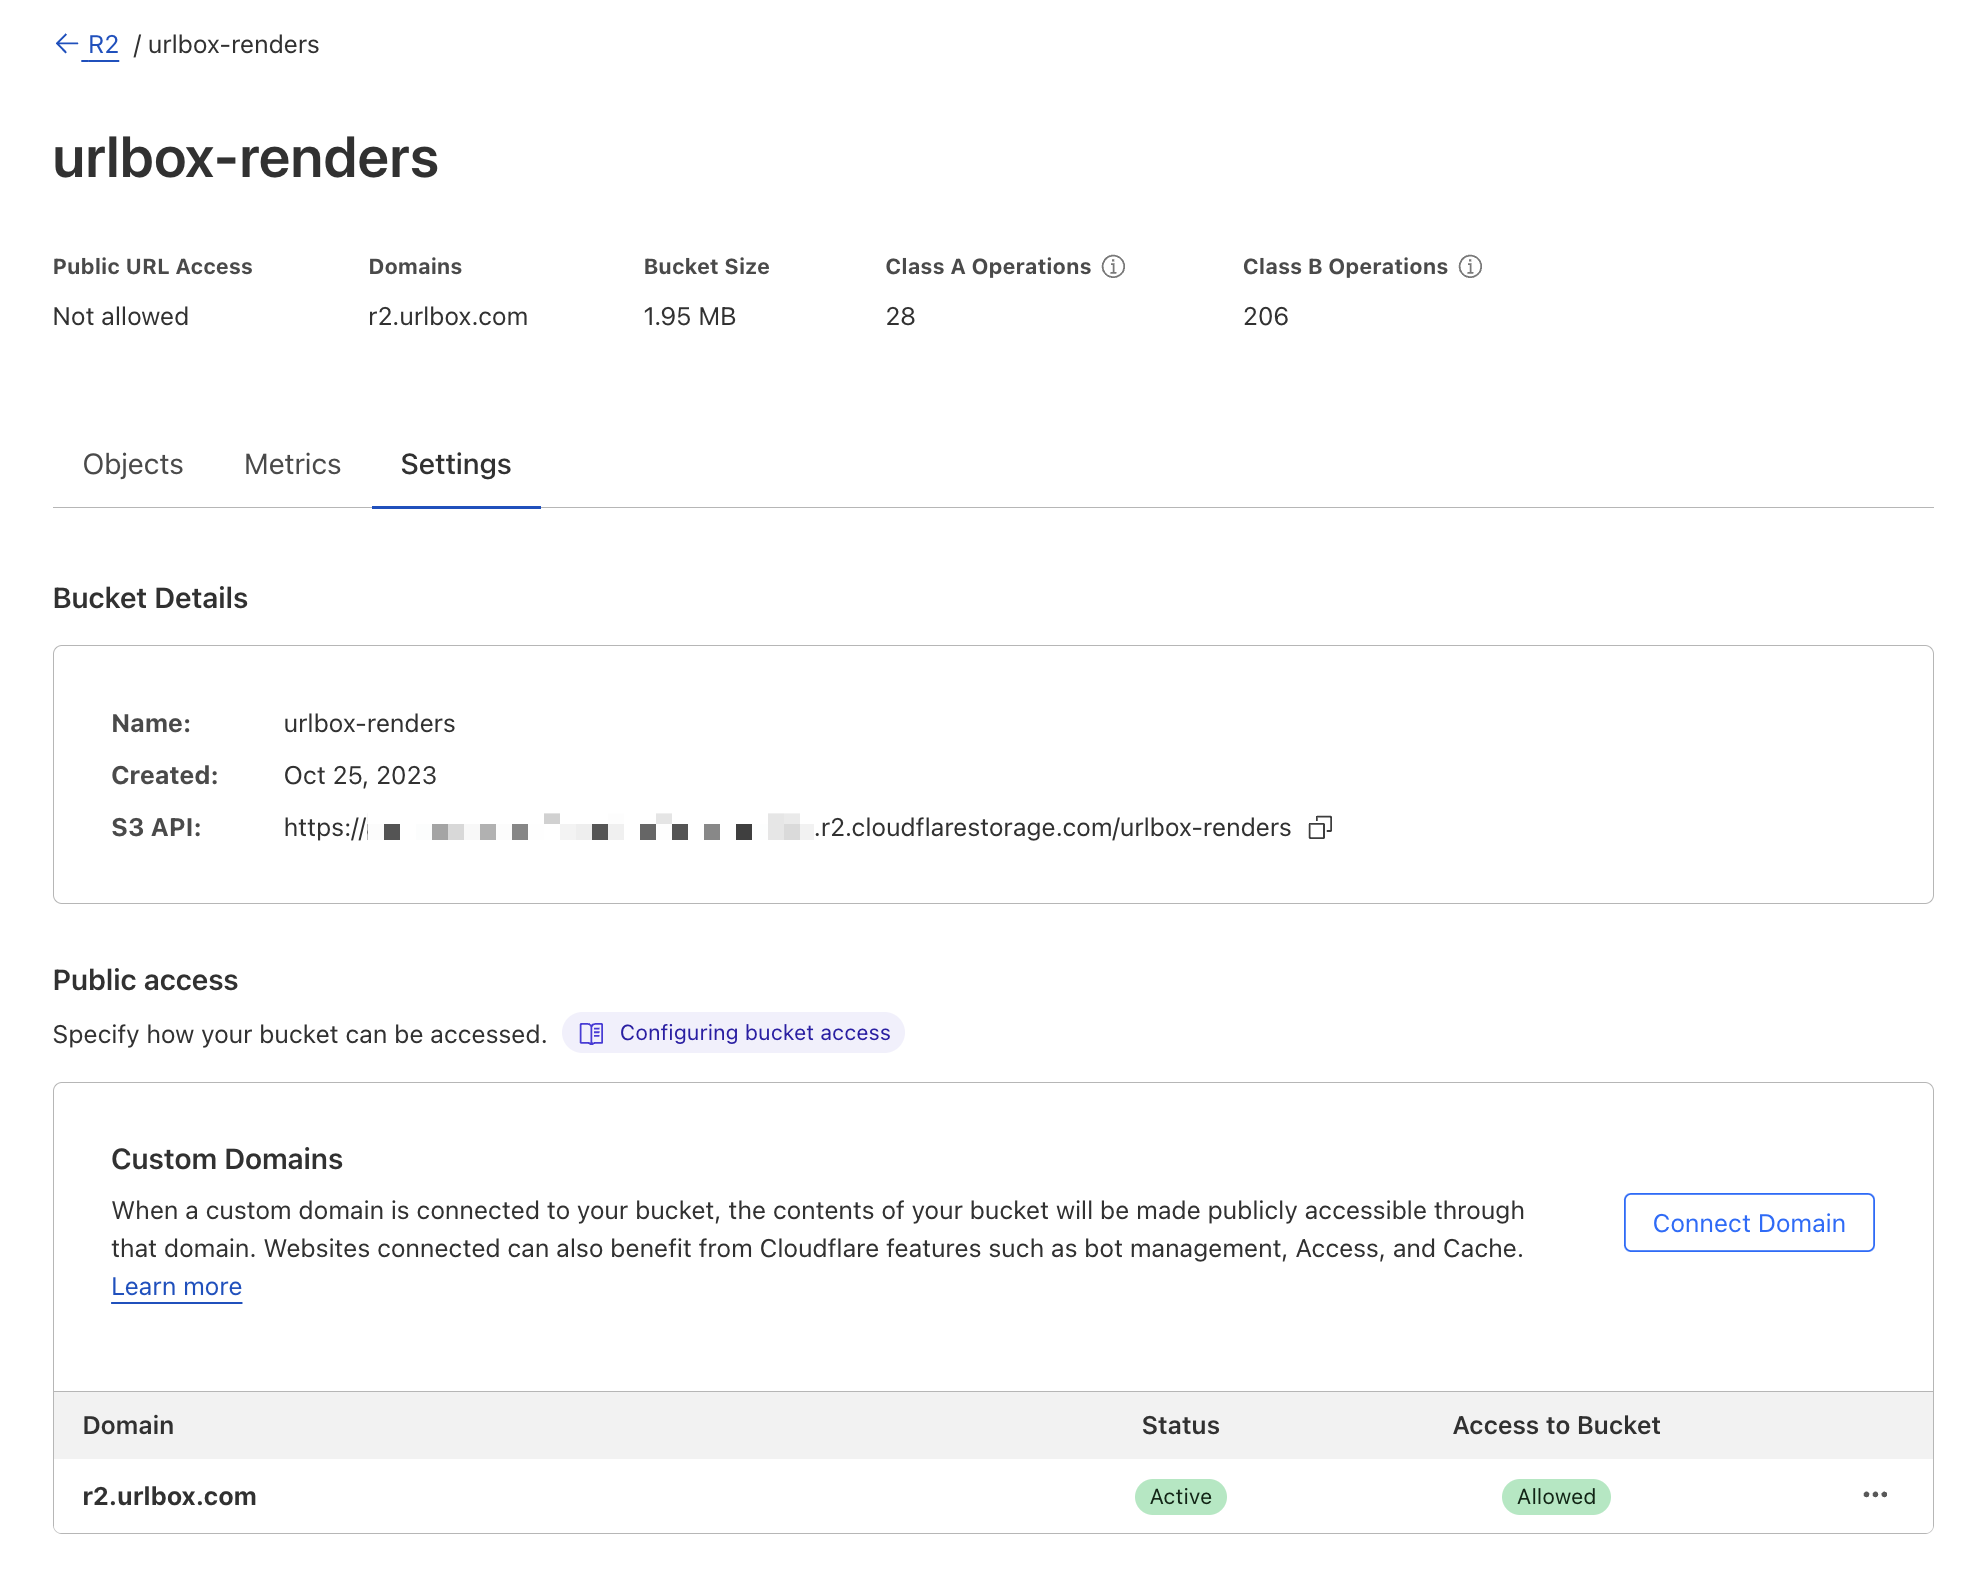
Then you can set CDN Host option in the Urlbox S3 config to your custom domain, e.g. renders.mydomain.com, and ensure that the Private Bucket option is now unchecked.
Once you've done this, Urlbox will use the custom domain to serve the renders from your bucket.
Start saving screenshots to your R2 bucket
Now that your R2 bucket is configured correctly, you can start saving screenshots to it.
You can do this by setting the use_s3 option to true in your API request.
For more options on how to configure how renders are saved to your R2 bucket, please see the saving to s3 compatible storage guide.
