
In this article we'll show how you can capture various website screenshots from a list of URLs in Airtable using the Urlbox website screenshot API. Urlbox has been converting URLs to images since 2012 it's wonderful to be bringing that power to Airtable 10 years later.
Table of Contents
Create a new Airtable base with a list of URLs
In Airtable we'll create a new Base called URL Screenshots.
Or, you can skip this step and view the Airtable base used in this article here: https://airtable.com/shrnEO30ijQ3FdcCy
In our table we'll add 5 columns:
-
One column named URL with
URLtypeThis column will be filled with several URLs that we want to take website screenshots of
-
A second column called Screenshot with
Attachmenttype -
A third column called Mobile Screenshot also with
Attachmenttype -
A fourth column called Full Page Screenshot with
Attachmenttype -
A fifth column called H1 Screenshot with
Attachmenttype
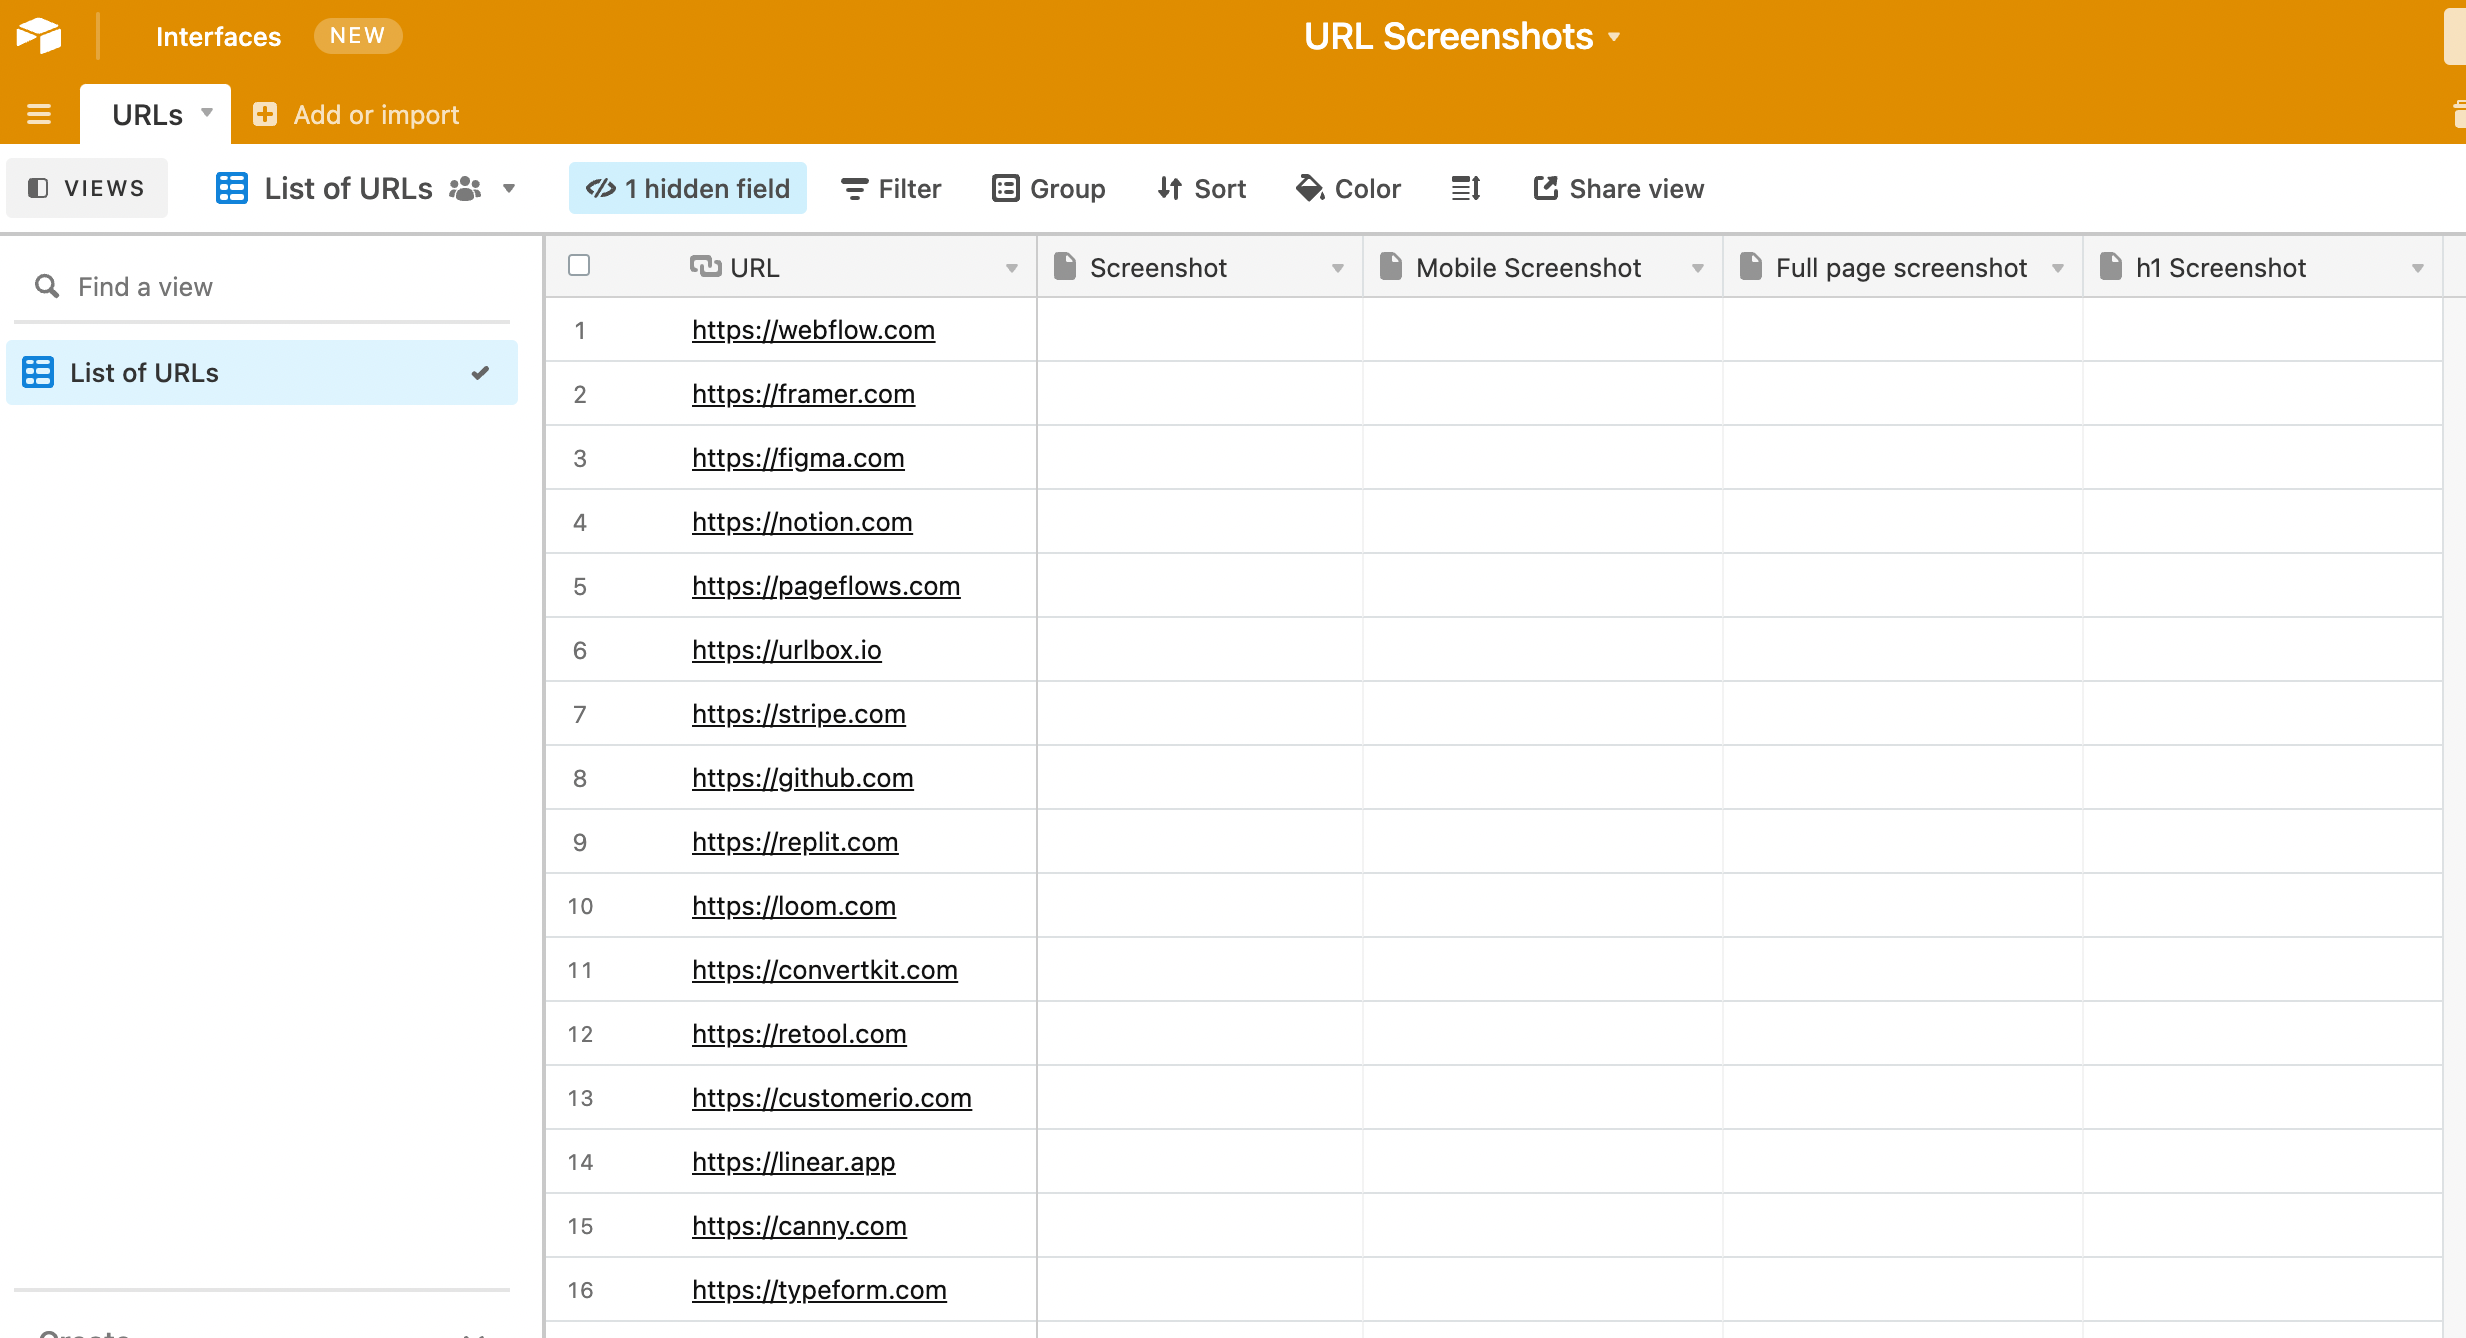
We now want to make a new view called URLs without Screenshots which we will add some filters to:
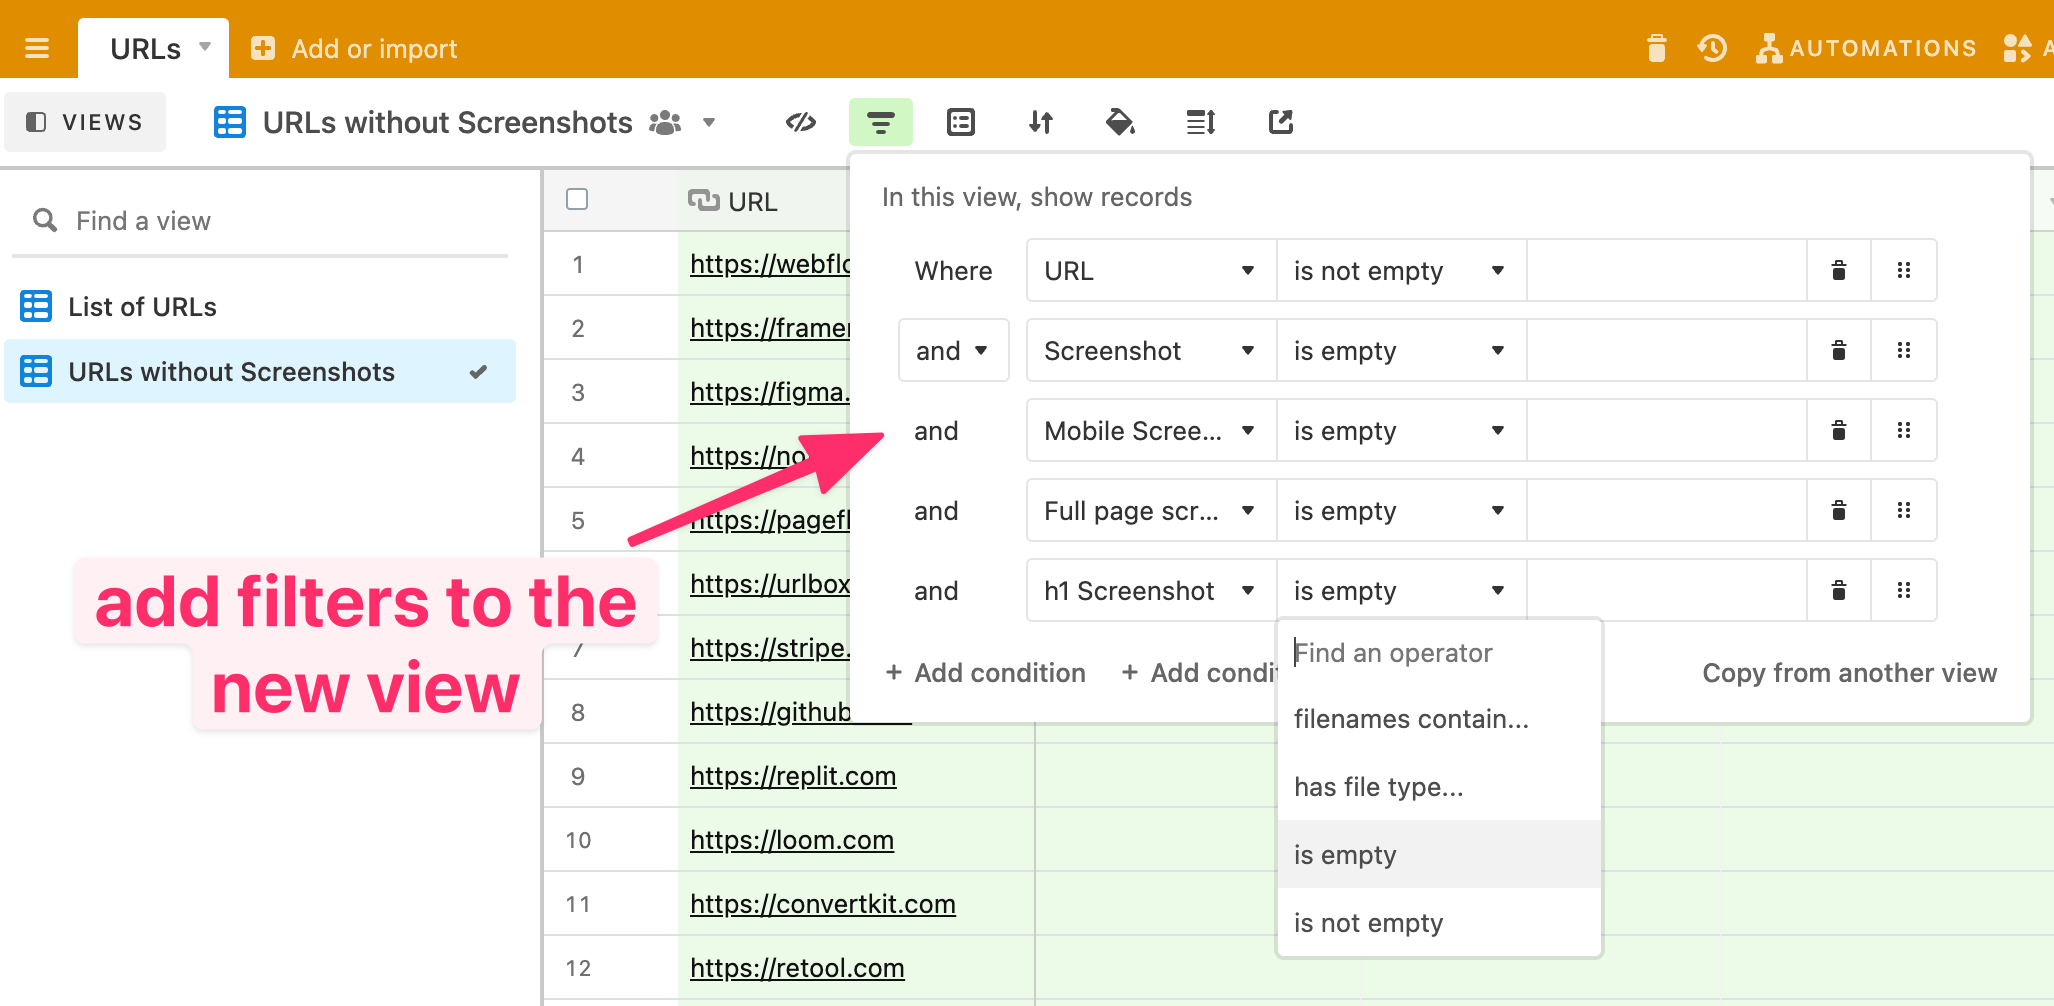
The filters should be where URL is not empty and all other columns are empty.
This will give us the list of URLs that do not have screenshots yet, which we will use in the next step.
Automating screenshots with a Zapier zap
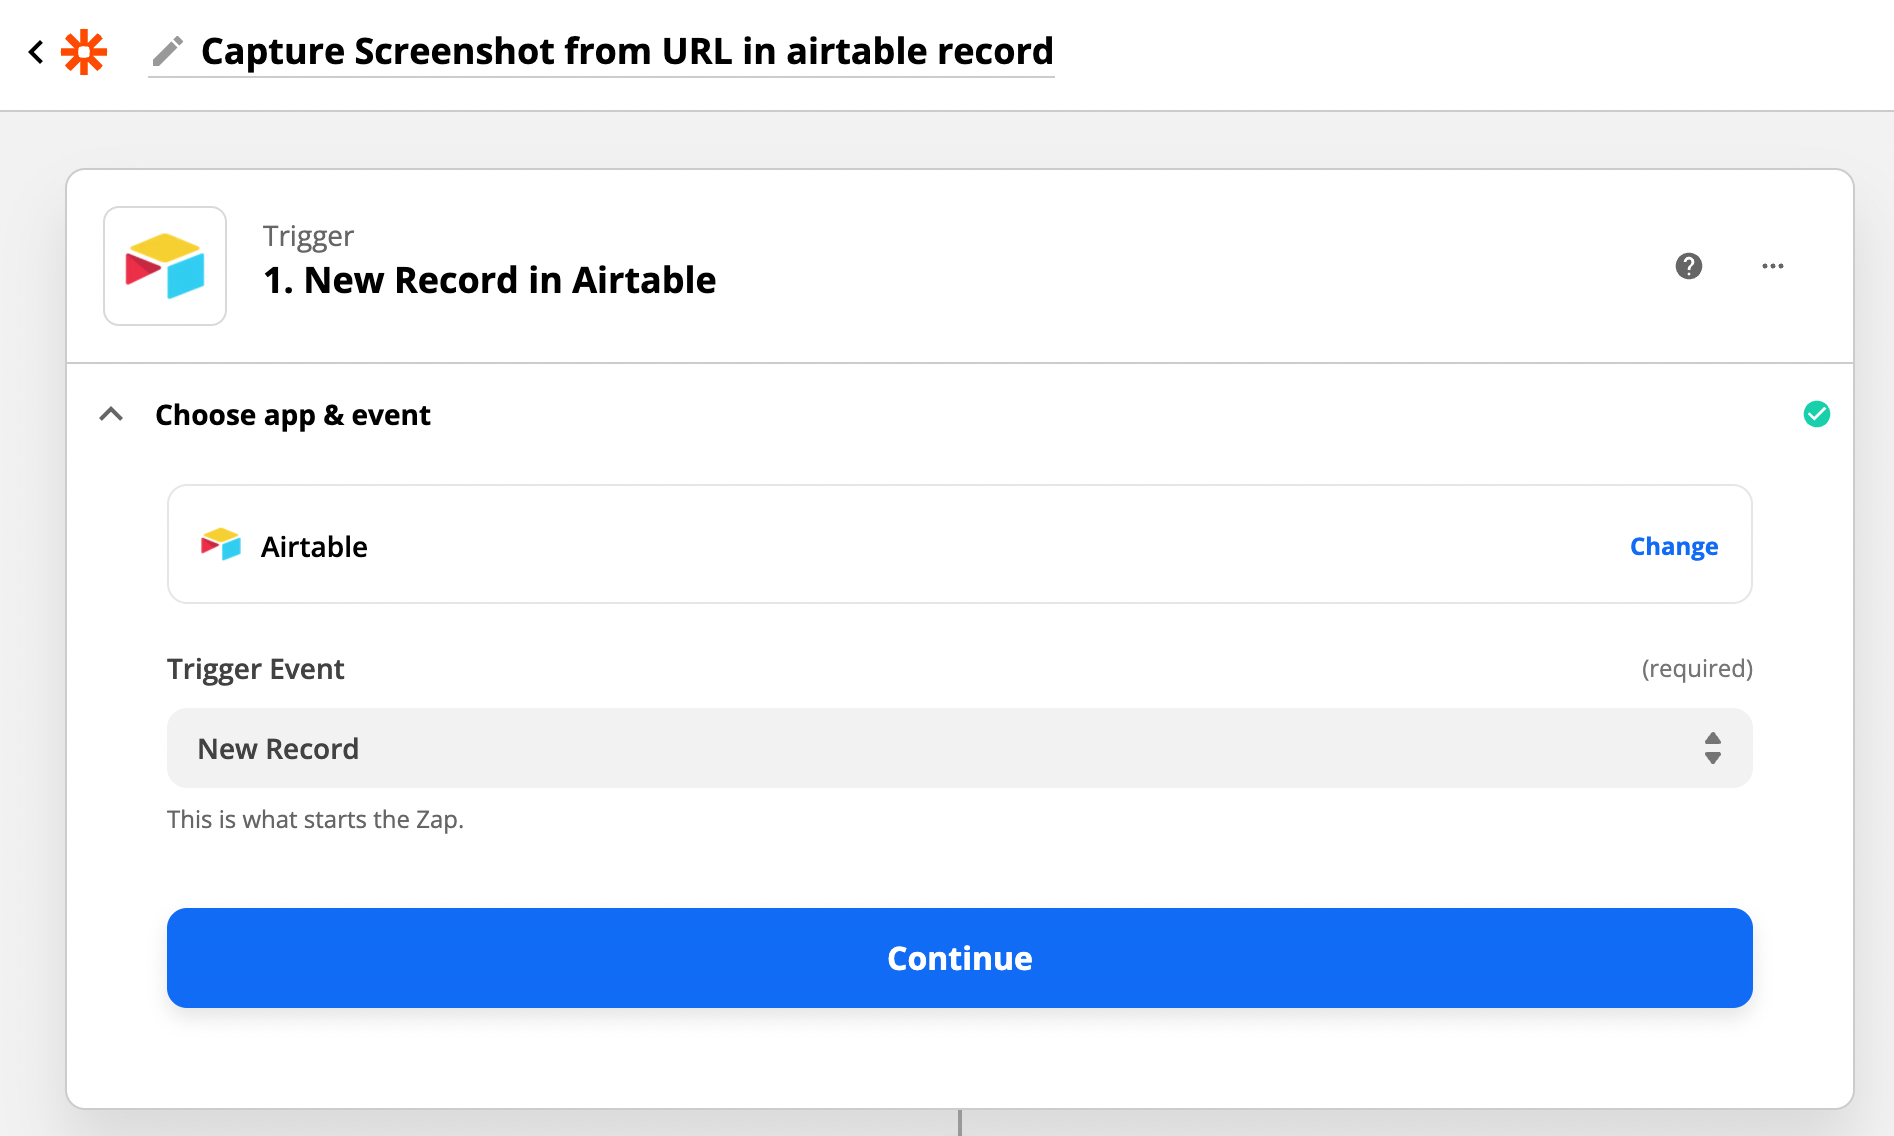
Great, now let's jump into our Zapier dashboard and create a new Zap.
We will find the Airtable integration and use that as our trigger. Choose 'New Record' as the trigger event.
On the next step, you'll be asked to sign in to Airtable.
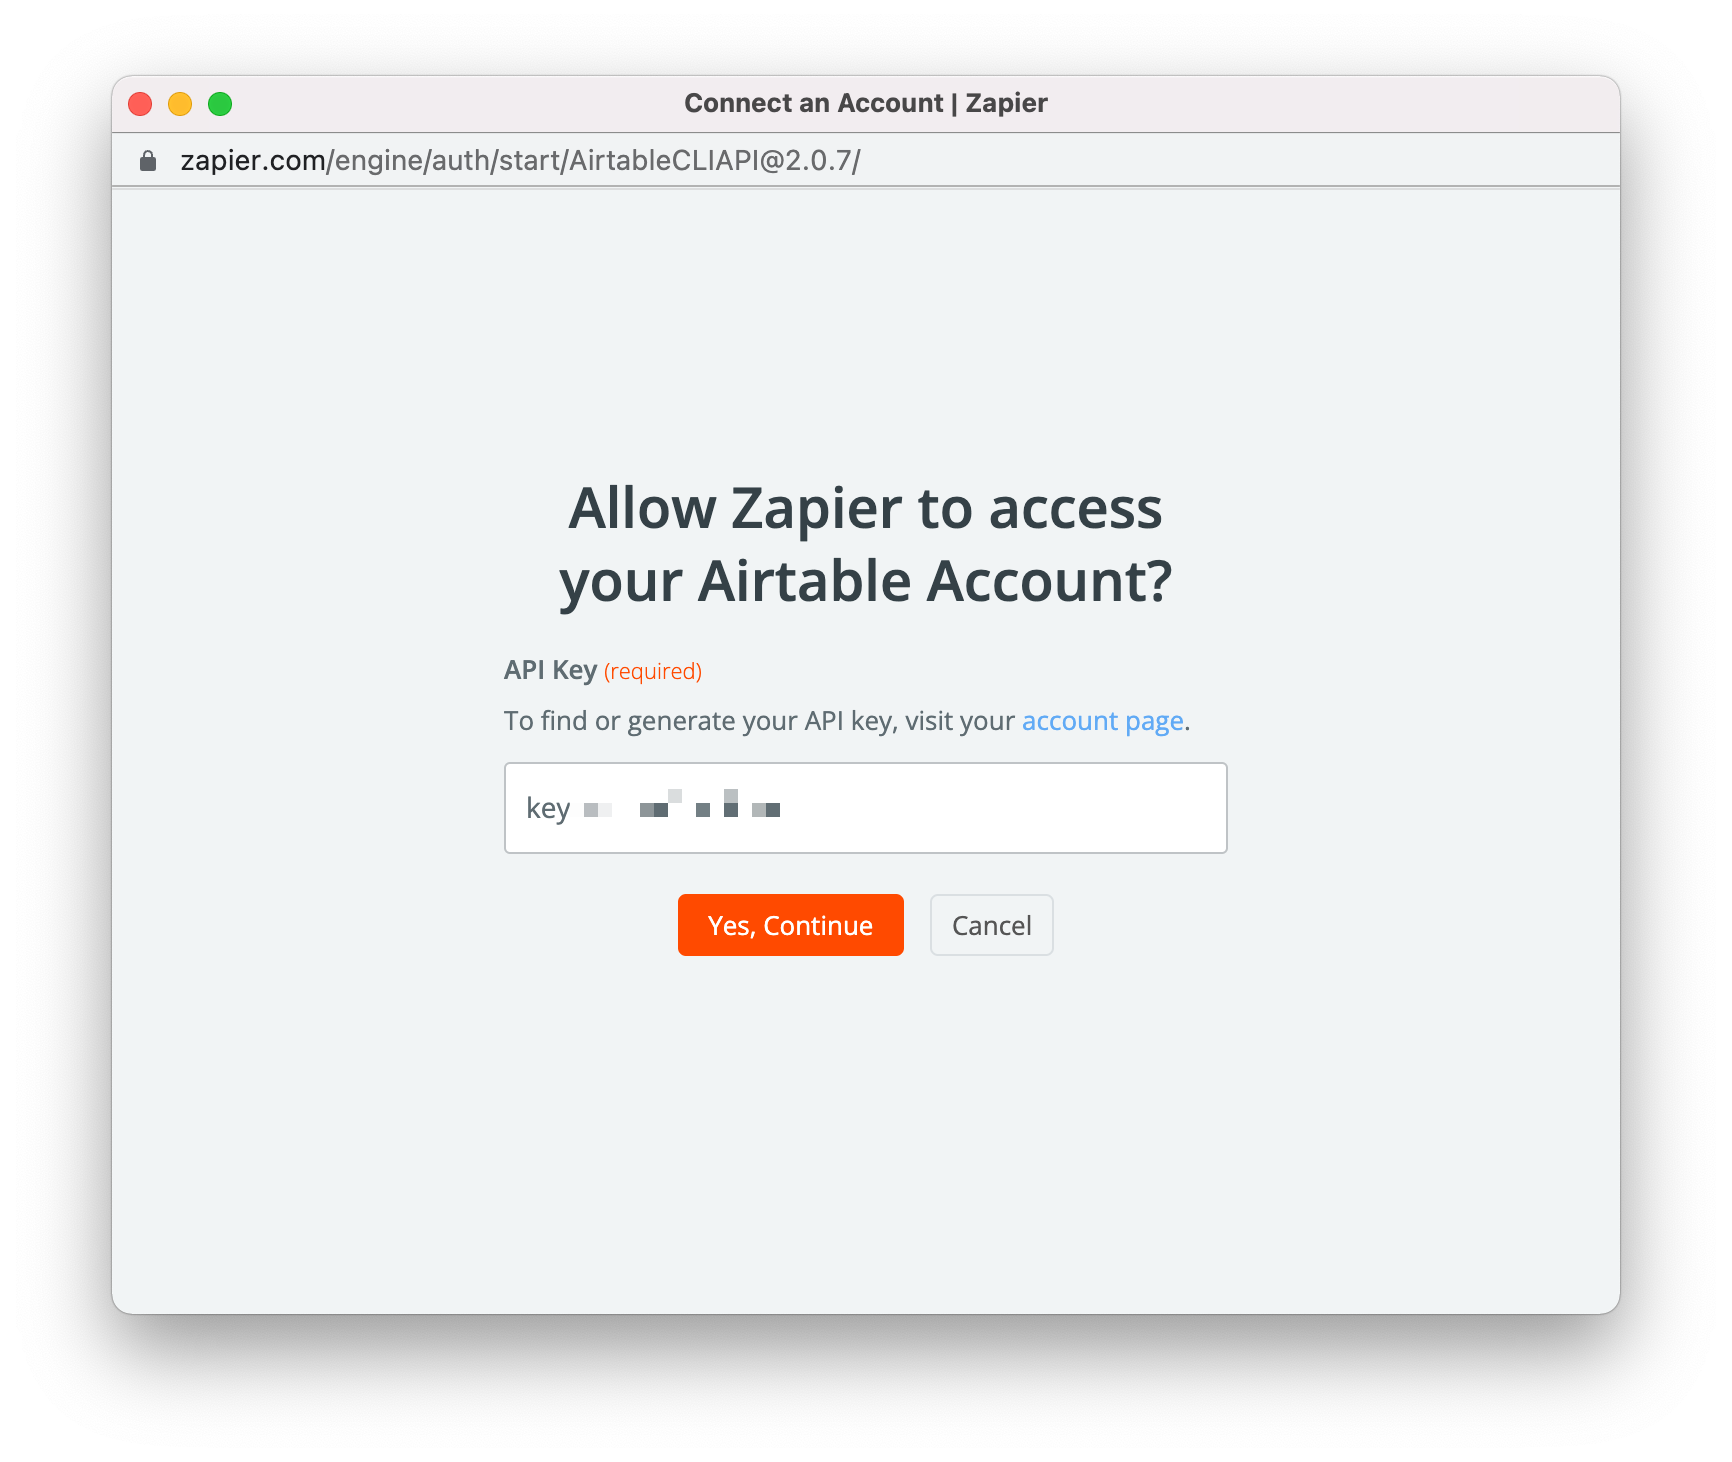
In order to do this, you'll need to copy your API key from Airtable in your account page:
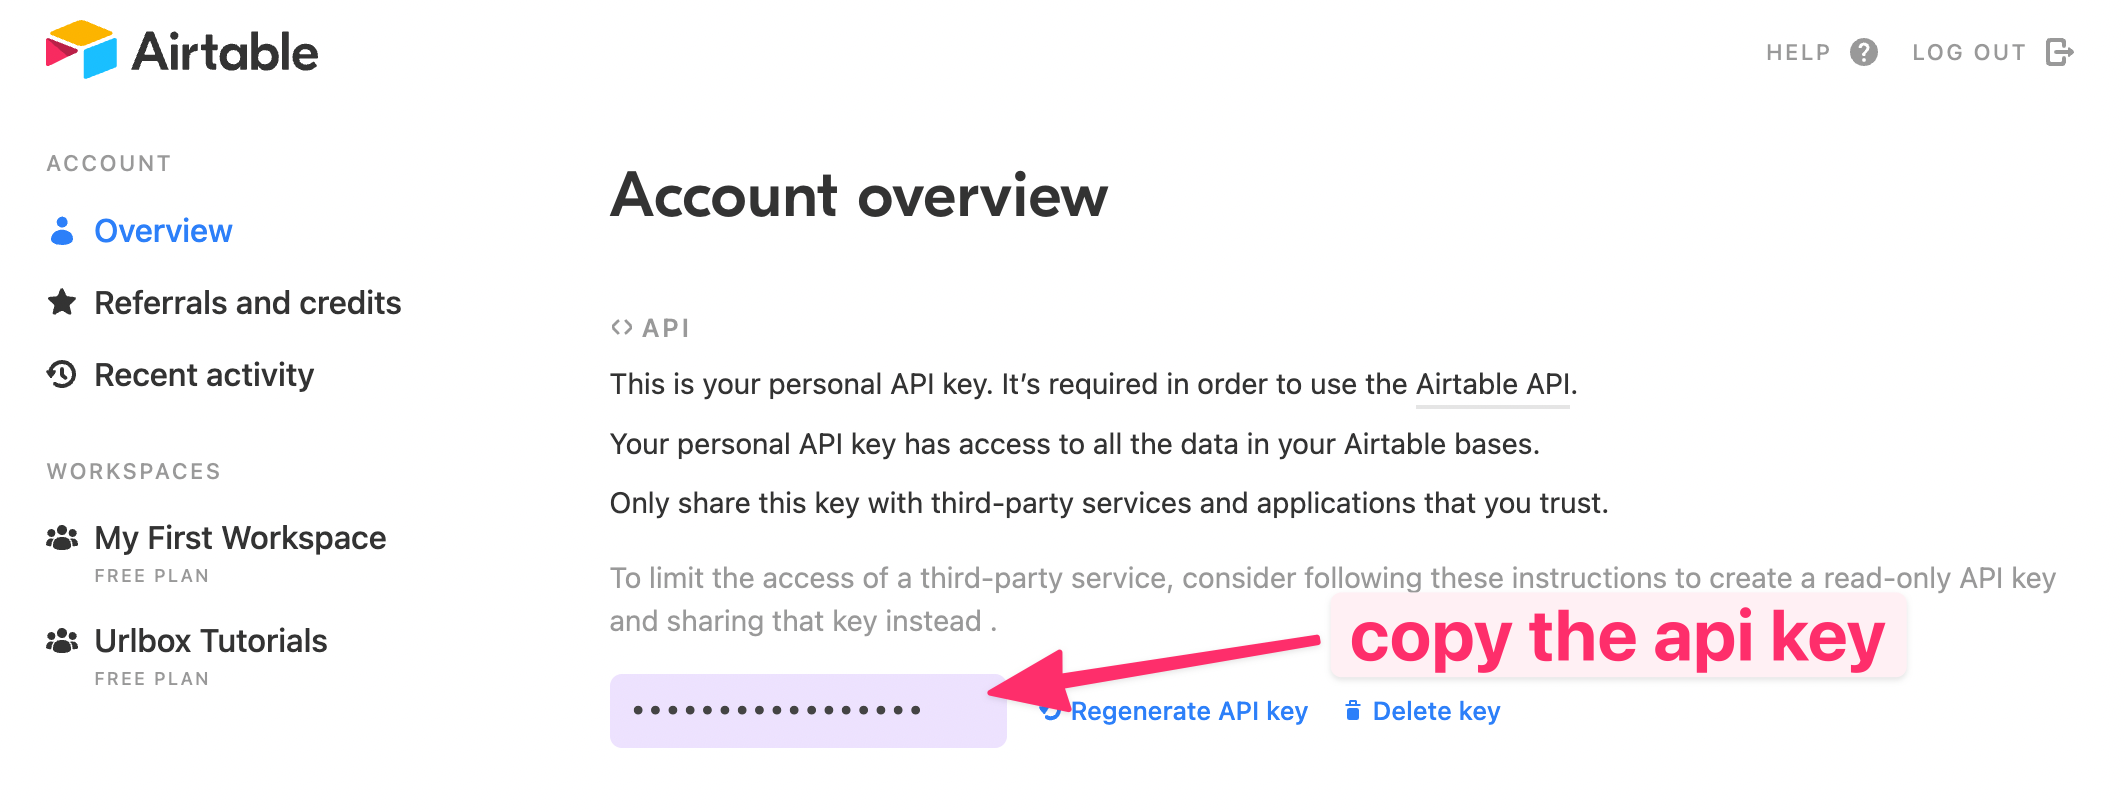
and paste that into the popup window from Zapier:
Now we can configure the Airtable settings.
We need to tell Zapier to pull records from the 'URL Screenshots' Base, in the URLs Table.
We also want to limit Zapier to only pull records from the view we just setup, which we called 'URLs without Screenshots'. This prevents Zapier pulling in records that have already been processed by the zap.

Once you test this setup in Zapier you should see one of the records from the Airtable view show up in the zap editor:
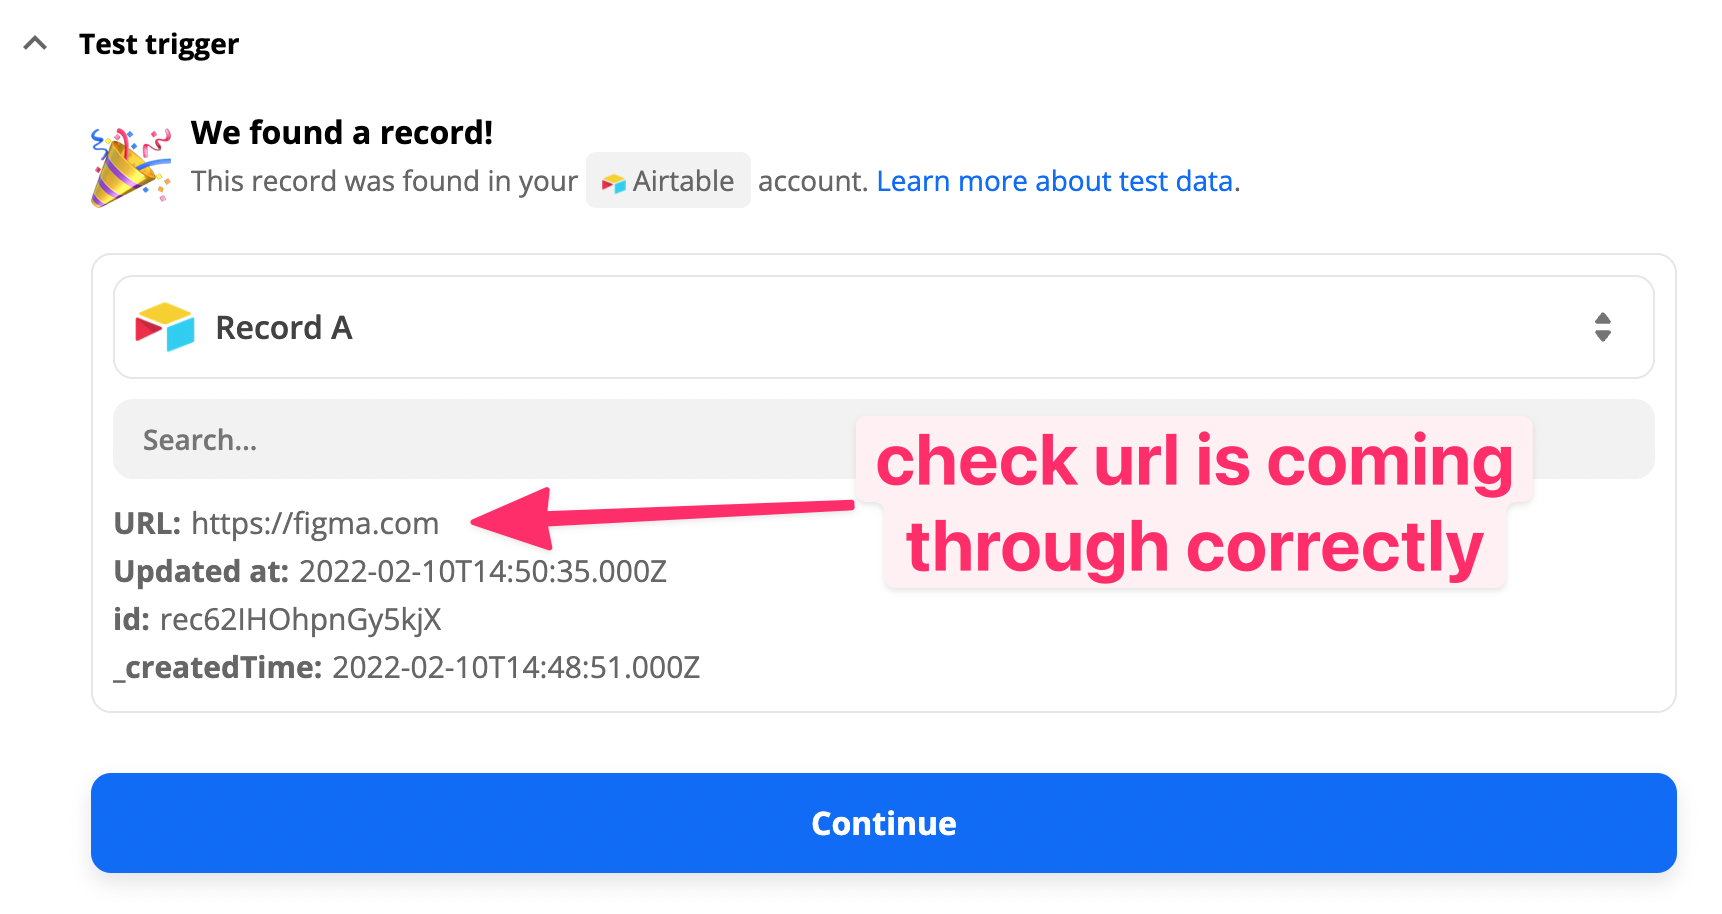
Great, now we can setup the Urlbox action to take various screenshots of each URL.
Set up the Urlbox action to take screenshots of the URL
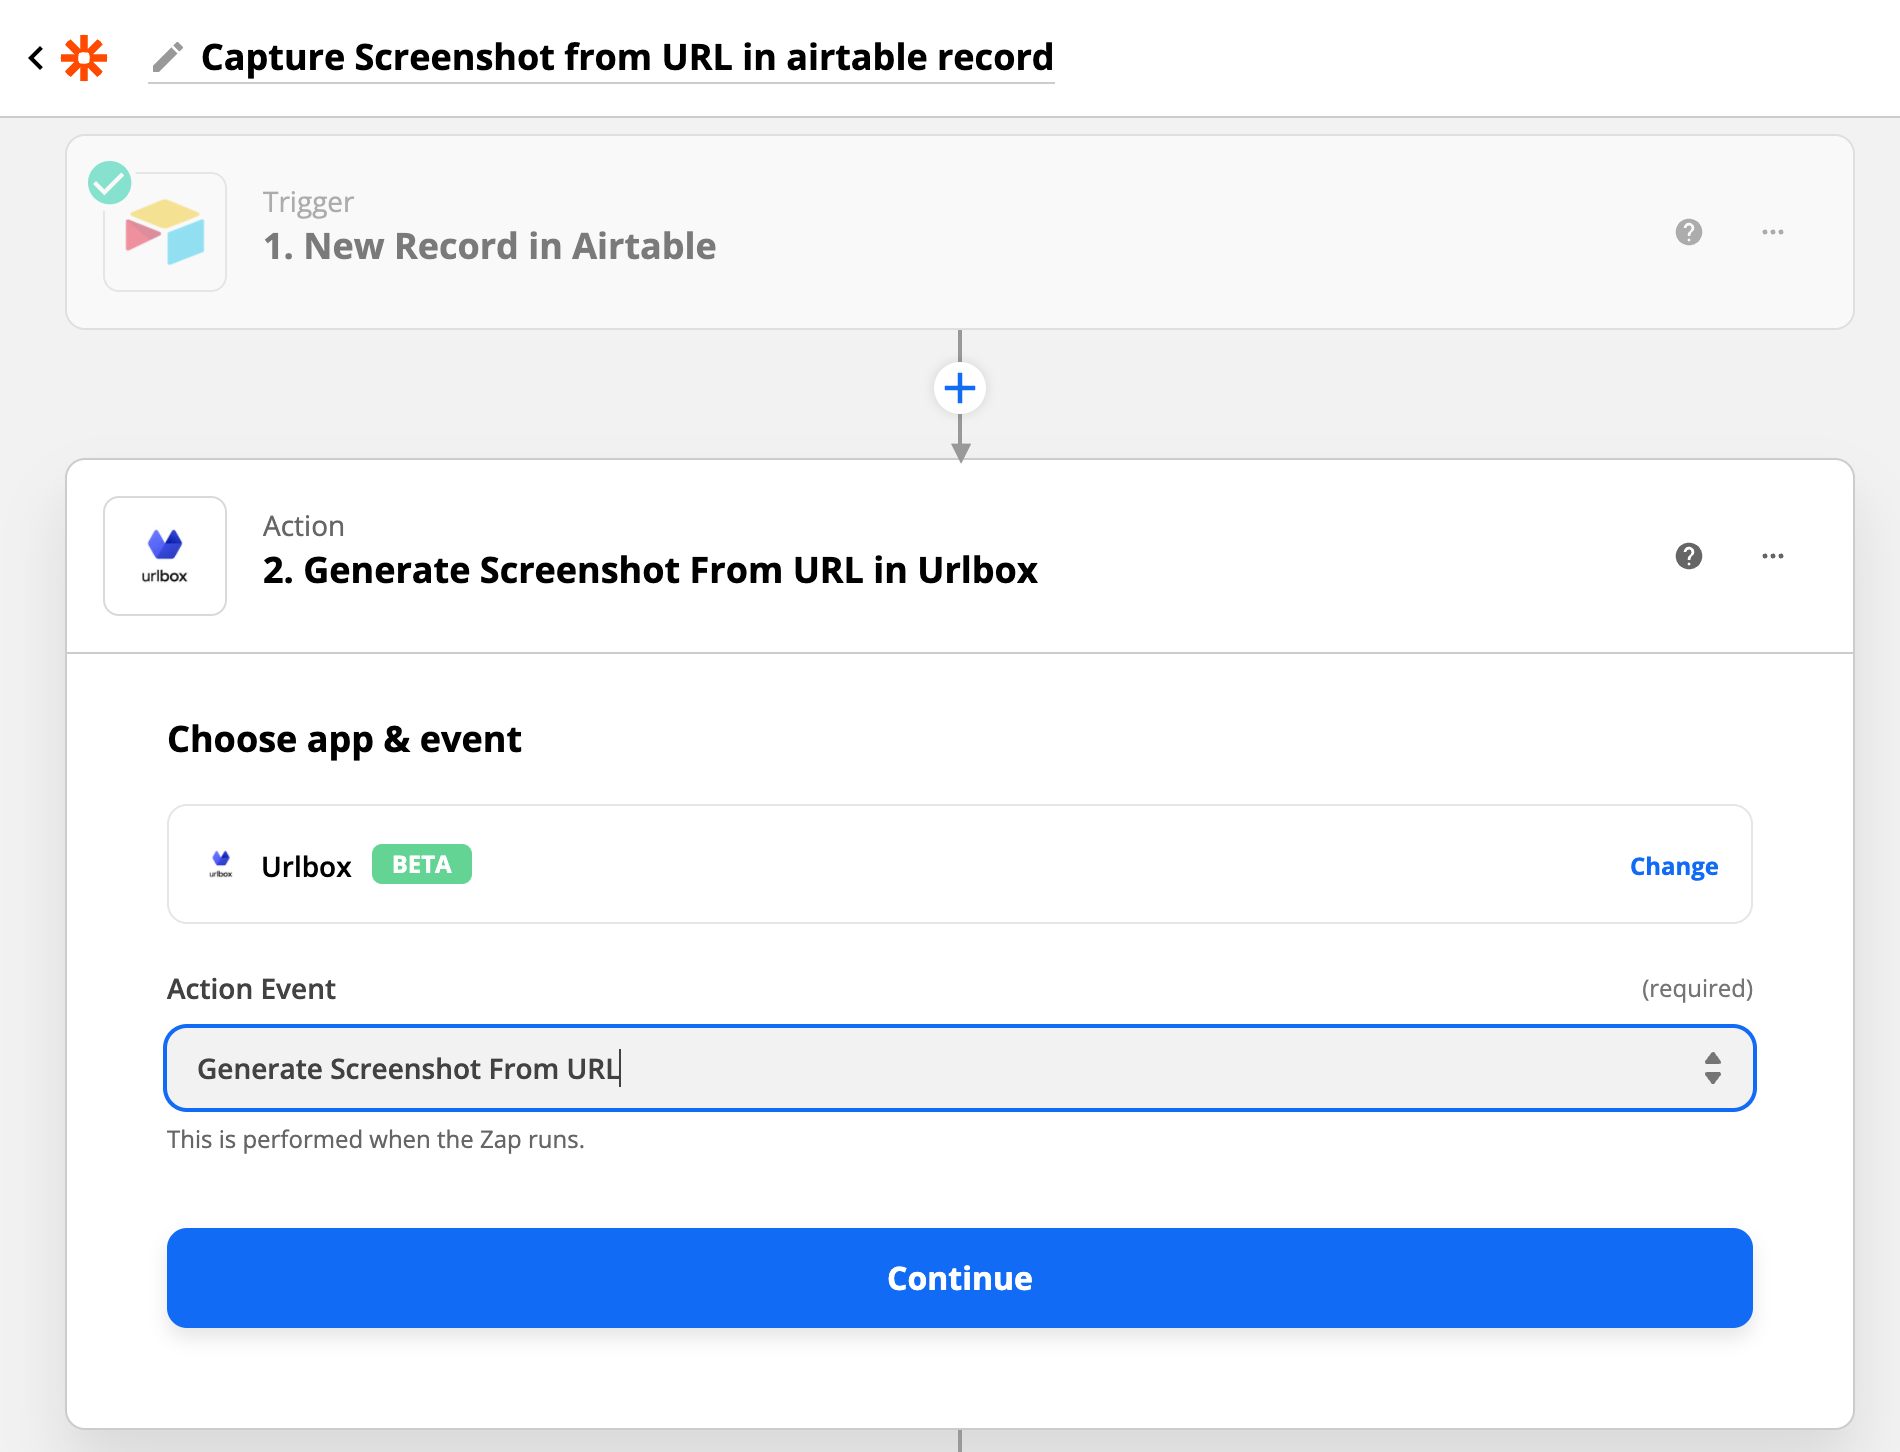
Click continue to create a new step in the zap.
Choose the Urlbox app and choose Generate Screenshot From URL as the action event:
Now either connect your Urlbox account by copying your Urlbox secret key into the pop-up box opened by Zapier, or if you've previously configured Urlbox in Zapier, choose your Urlbox account.
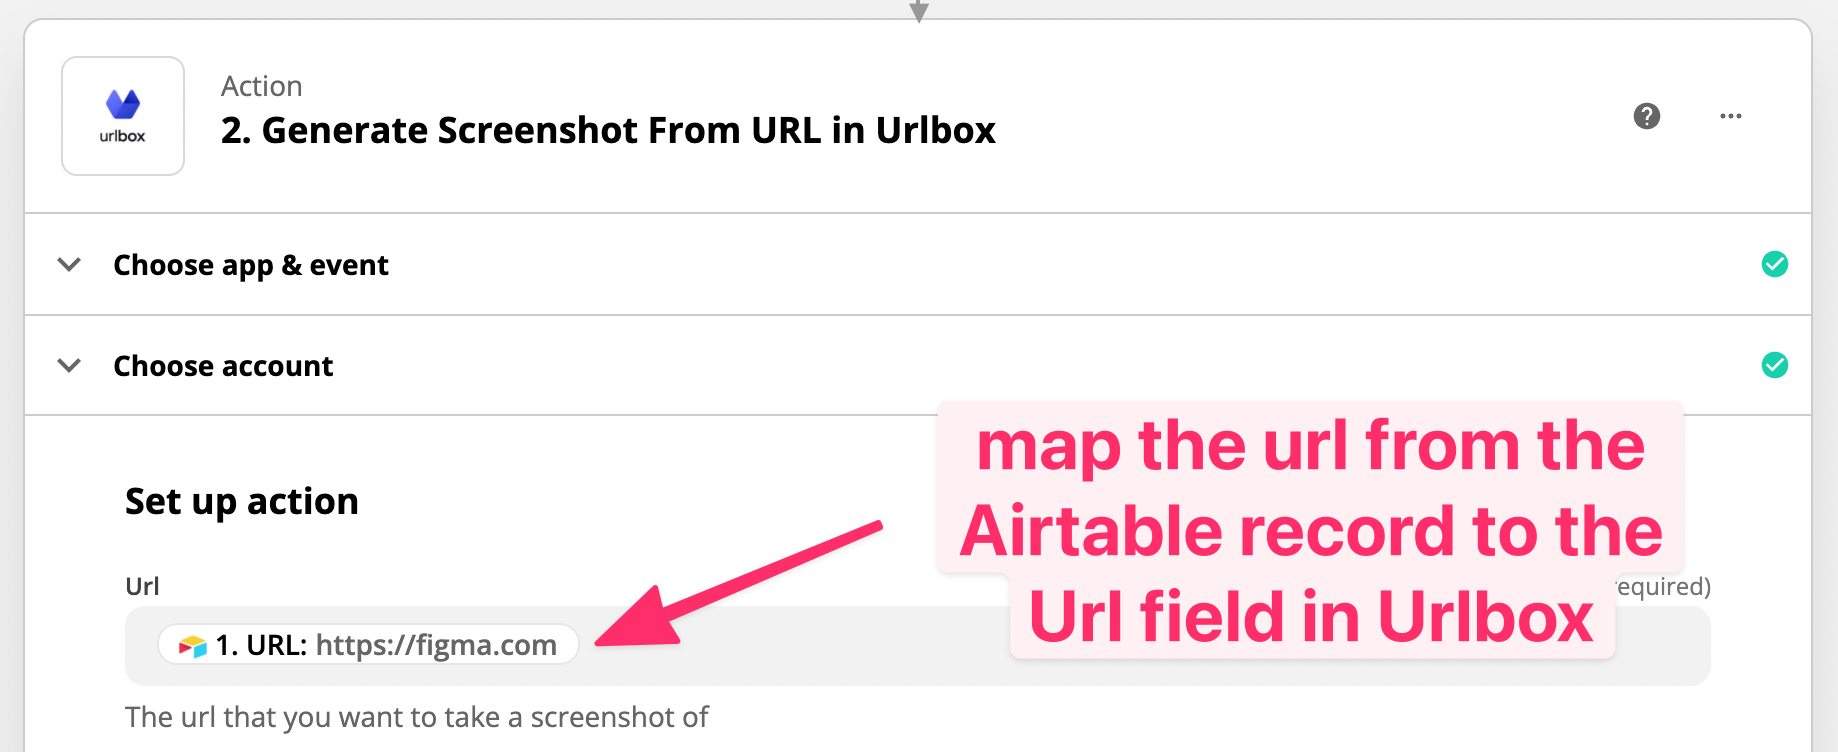
On the next step, you'll want to map the URL column from the Airtable record to the Url field in the Urlbox action:
You can choose any other options and click continue. For example, if you want to block cookie popups from the screenshot, choose to set the Hide Cookie Banners option to true in Zapier. You could also block ads from the screenshot by setting Block Ads to true.
Once finished, click the Test & Continue button to add another step.
Add full page, mobile and selector screenshots
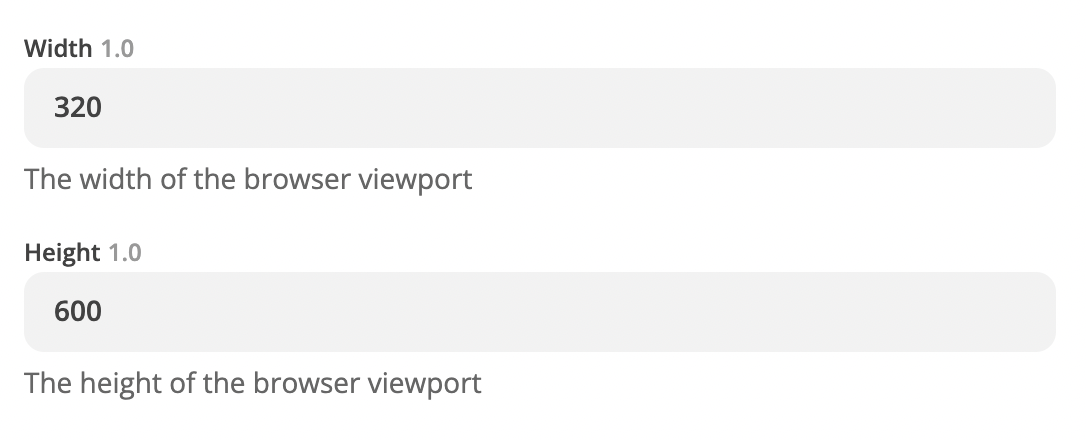
Create another Urlbox step, once again map the URL field to the URL input. This time change the viewport dimensions to 320x600. We can do this by setting the width option to 320 and height option to 600.
You can rename this step to 'Get mobile screenshot'.
Add more Urlbox steps to the zap, and map the url field as before. Each step should have different settings in order to generate different types of screenshot. These are going to correspond to the columns we setup in Airtable.
One step should generate a full page screenshot, by setting the Full Page option to true.
Another step will tell Urlbox to take a screenshot of a specific element on the page. For our example we will target the H1 element on the page by setting the selector option to h1. As this is a fairly common element on most websites, we should expect screenshots of the main heading of each page.

Each of these Urlbox screenshot steps in Zapier can be renamed to something more meaningful so that the final step's input can be mapped more easily.
Here is what your zap should look like now:

Saving the screenshots back to the Airtable table
The final step will use the Airtable integration again in order to save the screenshots back to the correct columns in our table.
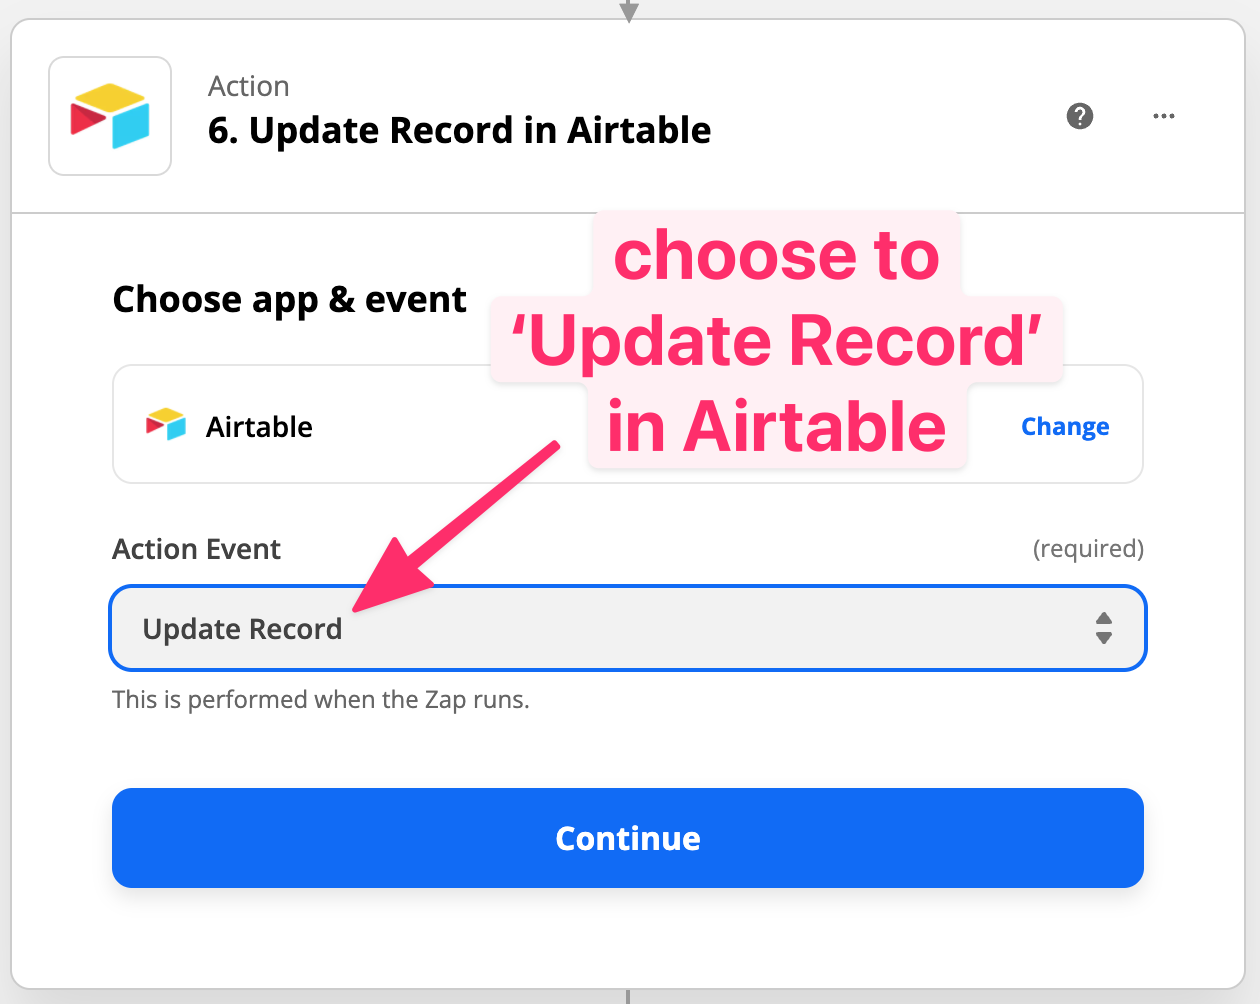
Choose the Airtable integration and choose Update Record as the action event:
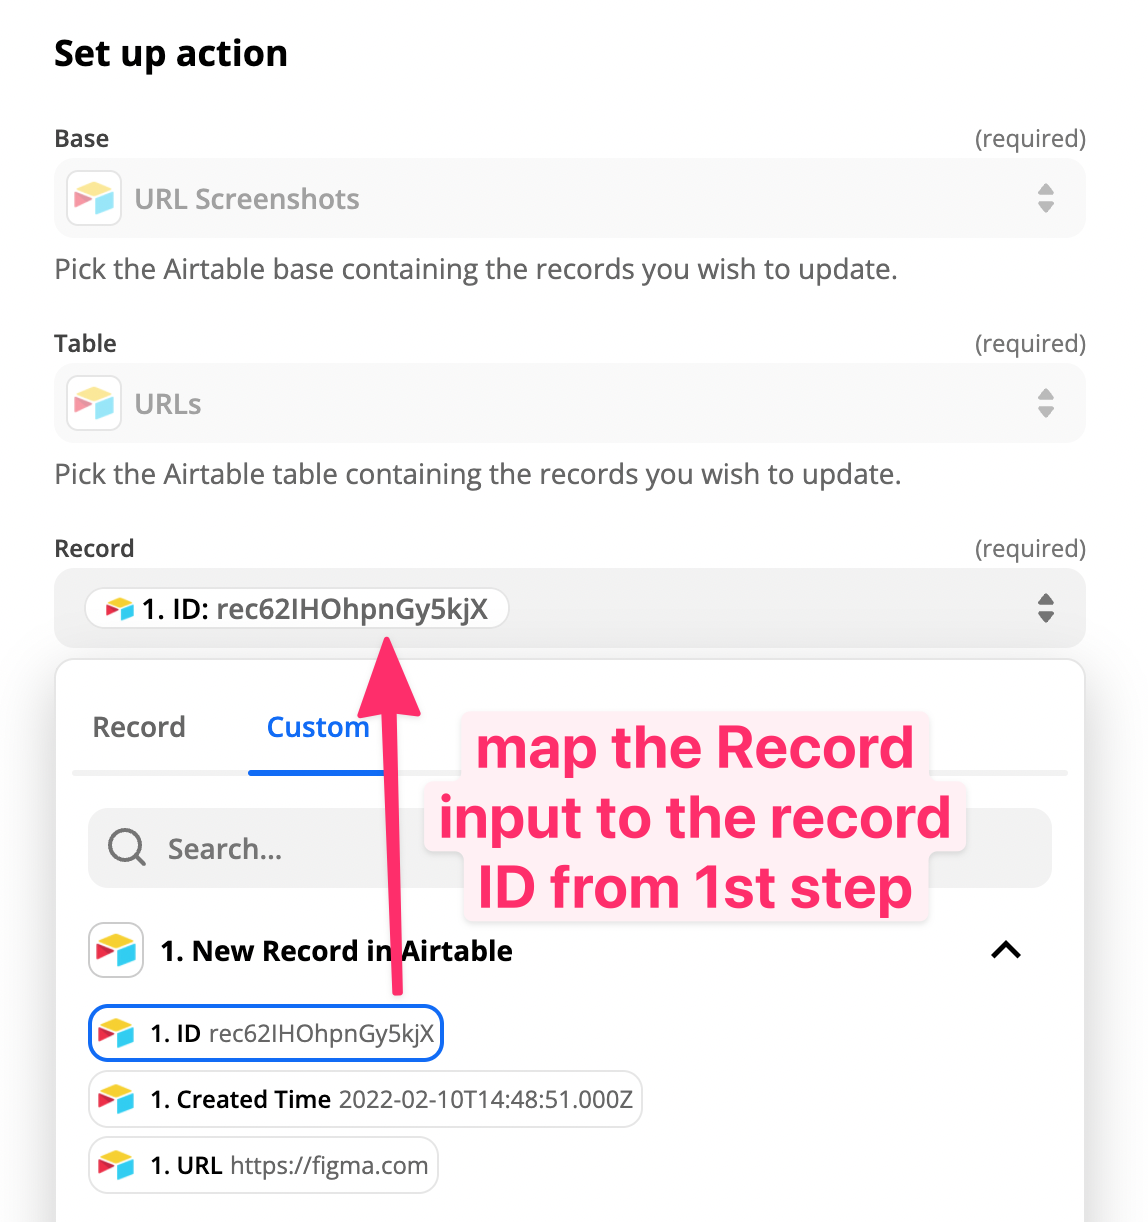
Once again, select your Airtable account and choose the Base and Table that you want to update.
Mapping the record ID
Crucially, the Airtable record needs to correspond to the current record being processed, so ensure that you map the Record input to the record ID from the first Airtable step:
Mapping the Screenshot URLs to the correct columns
Now it is just a case of mapping the Screenshot URL output from each Urlbox step we setup above, to the corresponding column in our Airtable record.
This is where re-naming our Urlbox steps comes in handy:
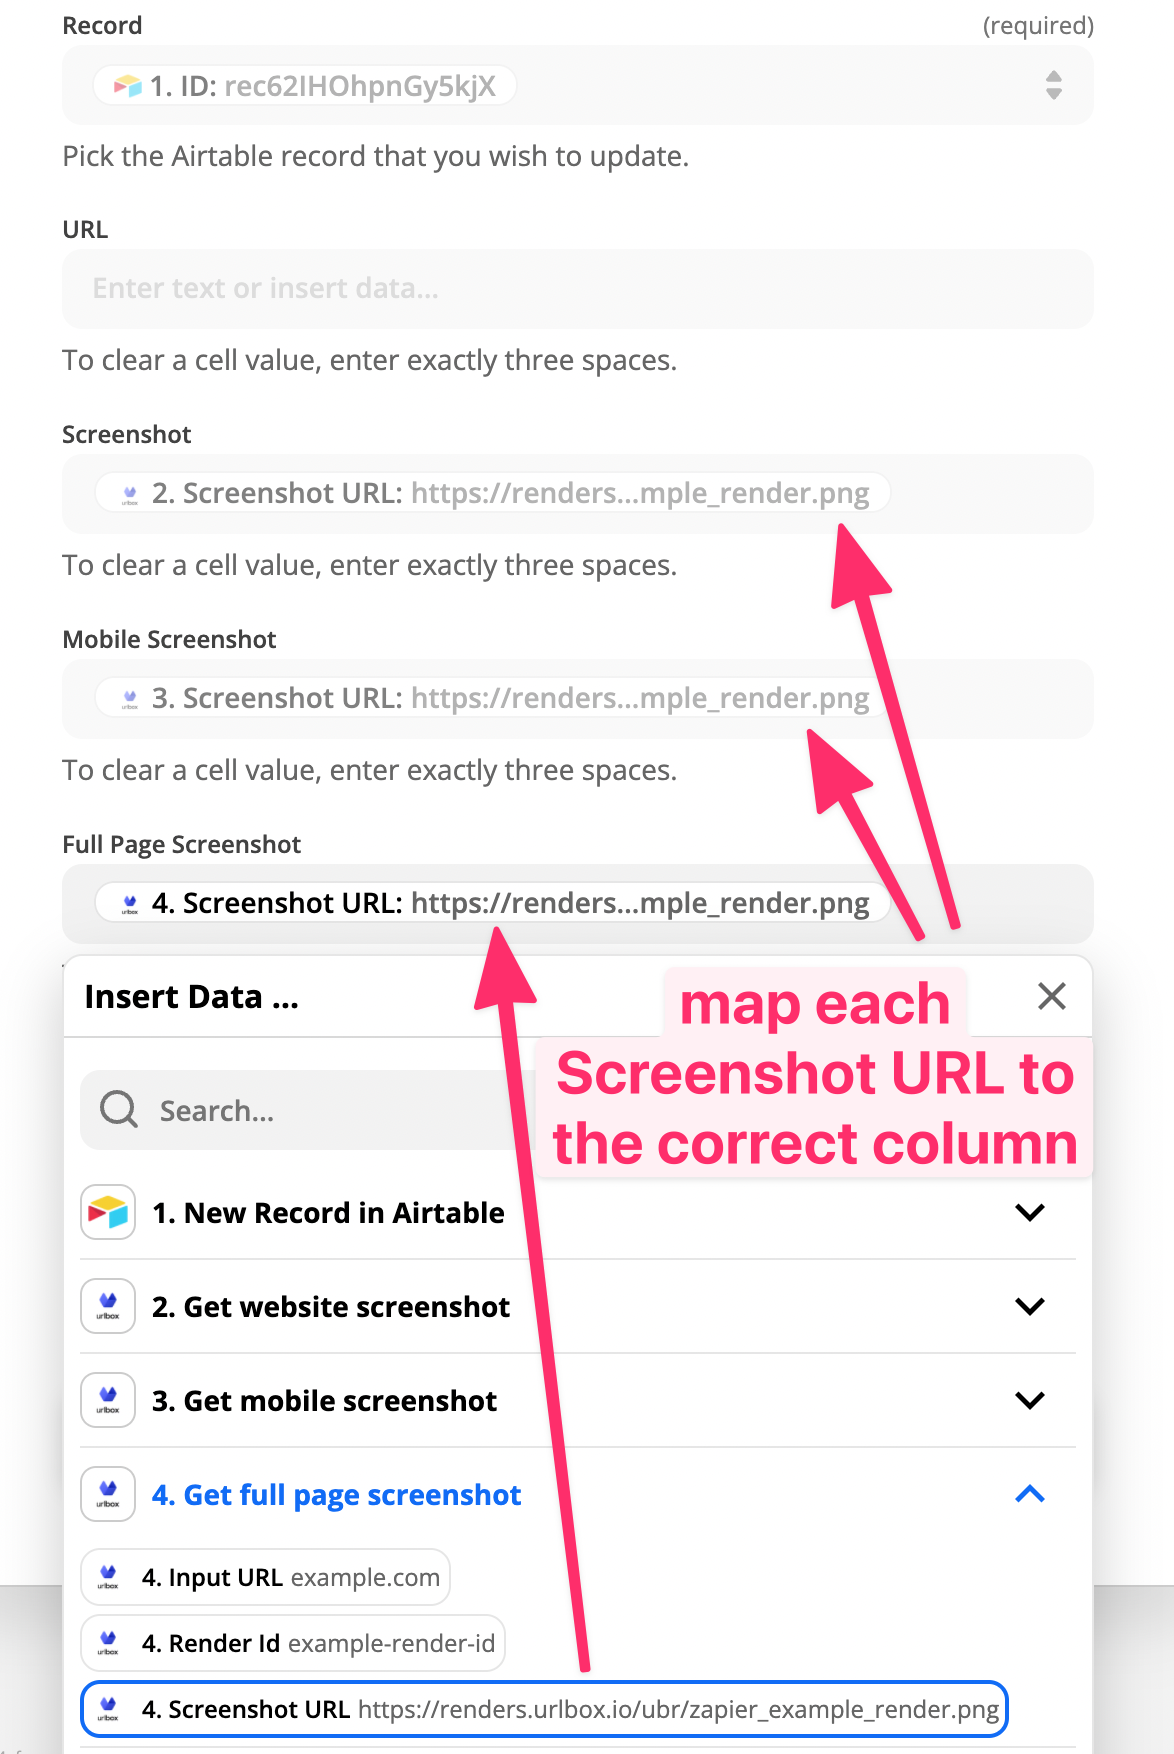
You might notice that the Screenshot URL output for each Urlbox step is the same. This is simply sample data that is used by Zapier to create the zap. Once the zap is run, these Screenshot URLs will be replaced with the actual screenshots.
Once the screenshots are mapped to the correct columns, click continue. You can skip the test on the next step, as this will just save our dummy screenshot to your Airtable record, rather than the actual screenshot.
Now you're ready to turn on the zap and run it..
Running the zap
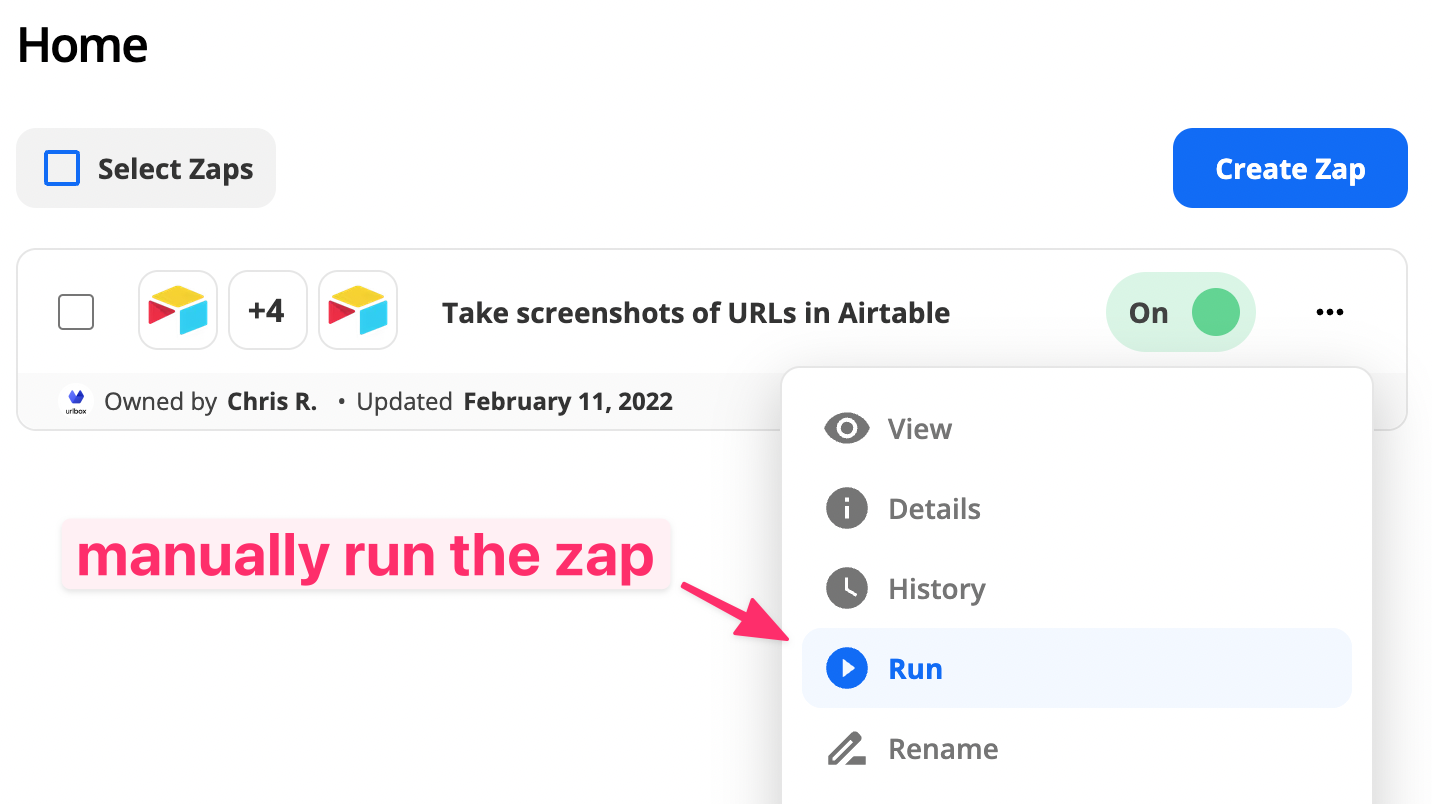
Turn the zap on and Zapier will run it once every 15 minutes (or however frequently your plan allows).
You can manually run the zap too by clicking on Run Now button:
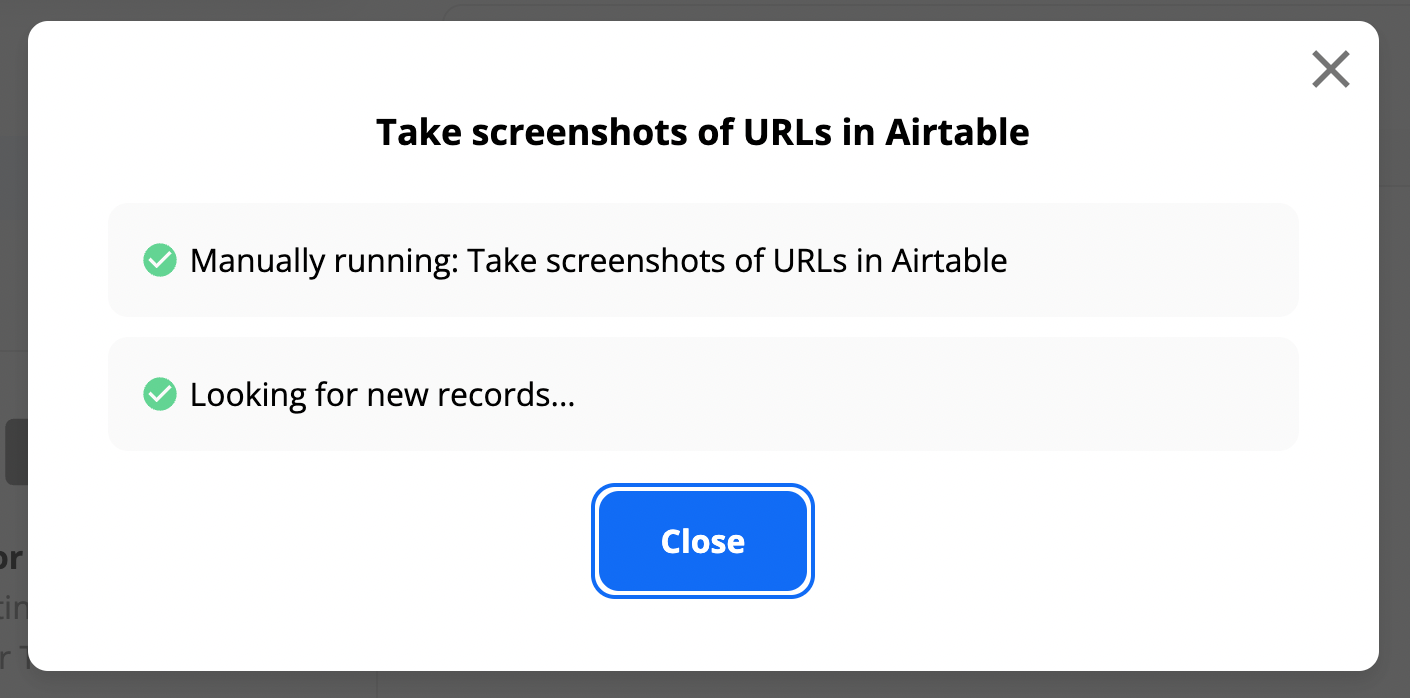
You should see the following pop up when the zap is run manually:
Switch over to your Airtable, and watch the screenshots get generated automagically:
Great, we have now learned how to generate several kinds of website screenshots from a list of URLs in Airtable.
Bonus - Getting the URL to the screenshot images
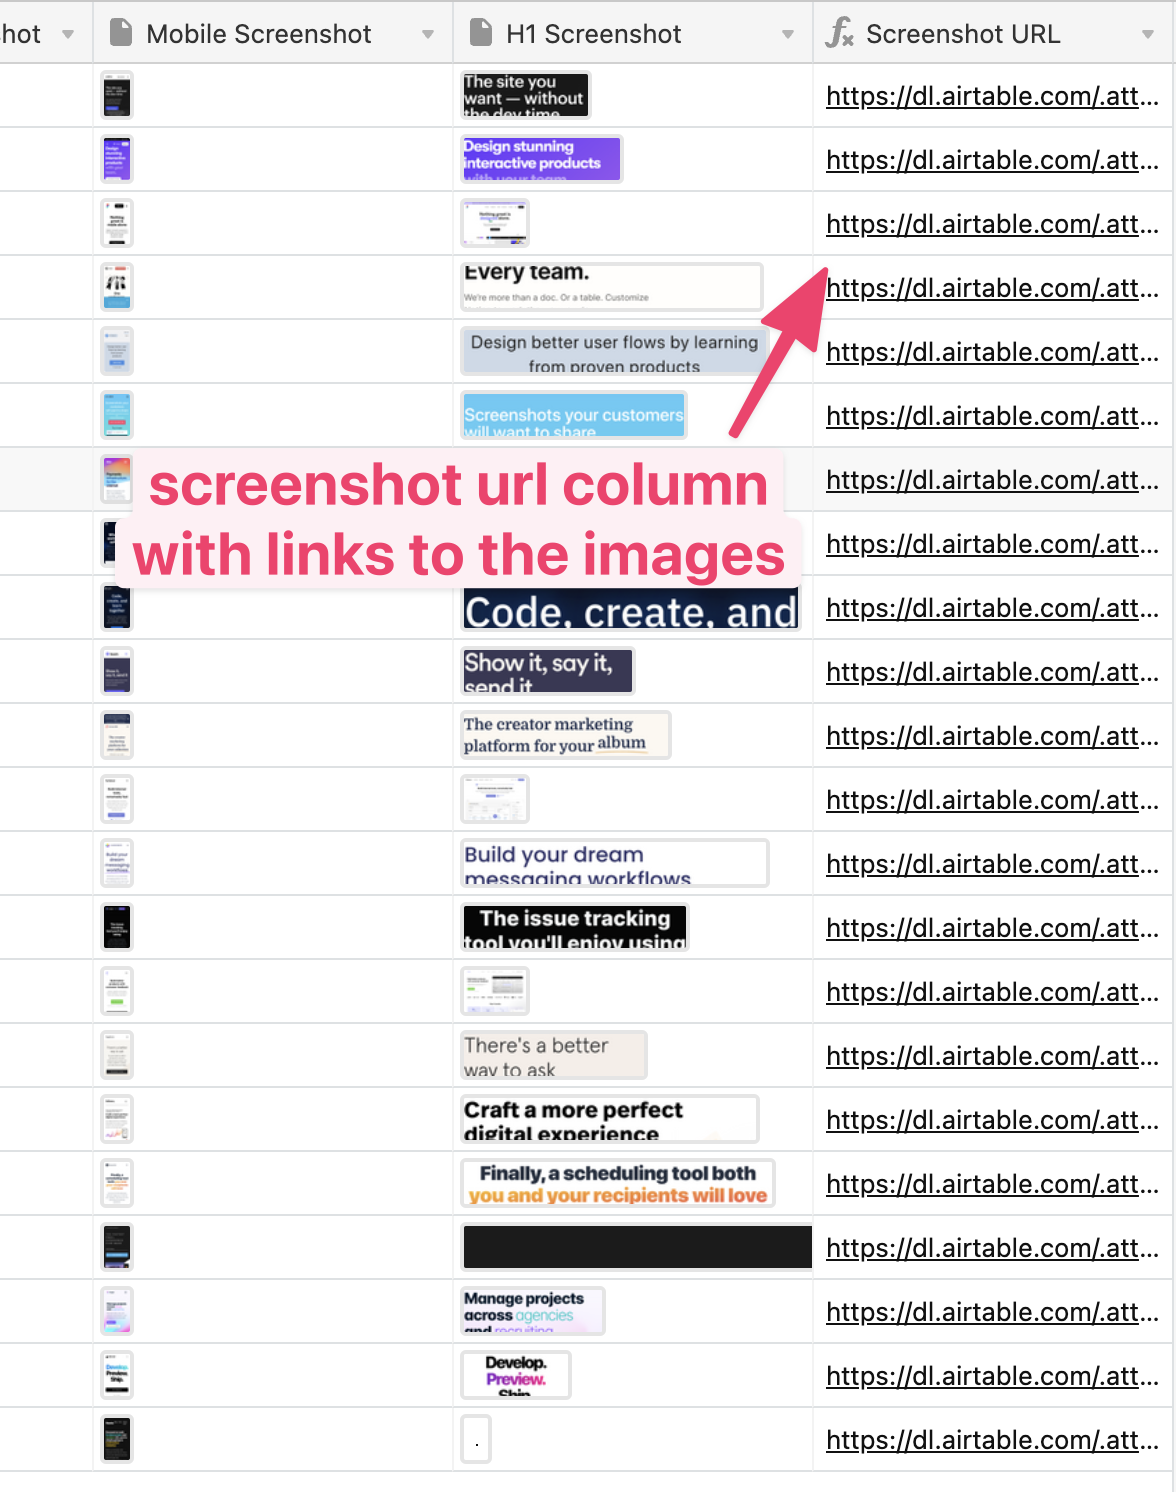
Since we stored the screenshot URLs in Airtable attachment columns, the image files have been saved to Airtables own cloud storage. If we want to get a direct link to these assets, we can add a new column to our table.
Create a new column of type Formula and call it Screenshot URL.
Paste this into the Formula field (thanks to this comment), replacing Attachment Field with the column name of the attachment field, in my case this is Screenshot.
RIGHT(LEFT({Attachment Field}, LEN({Attachment Field}) - 1), LEN(LEFT({Attachment Field}, LEN({Attachment Field}) - 1)) - SEARCH("https://", {Attachment Field}) + 1)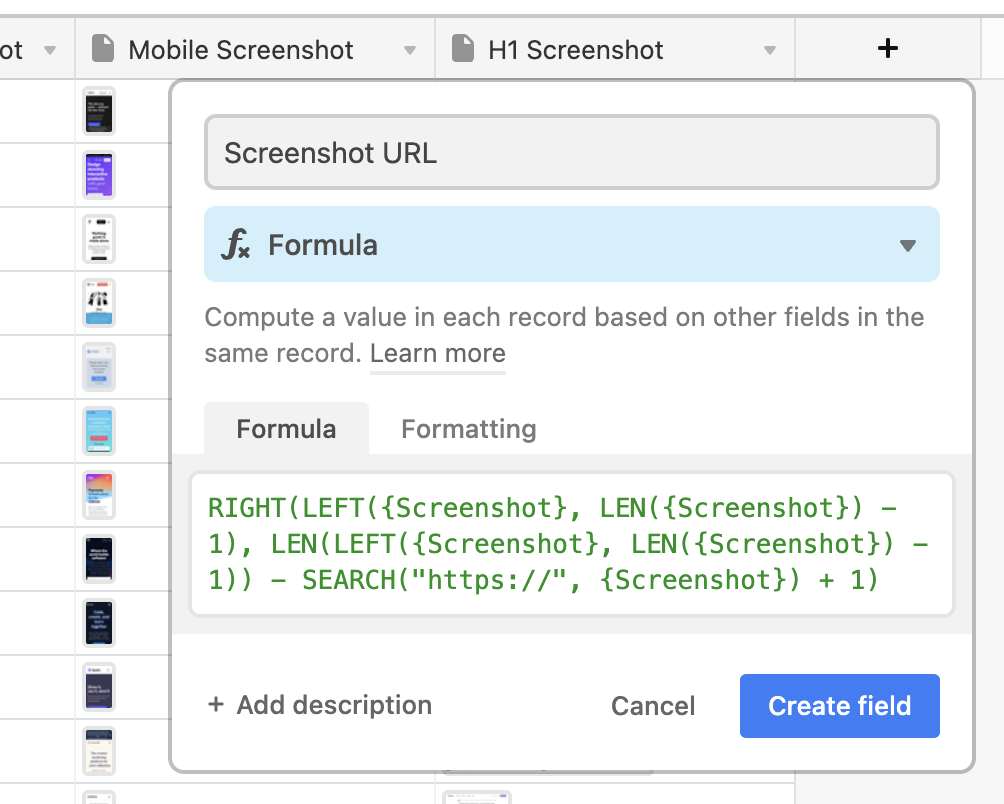
If that worked, you'll end up with a column filled with direct links to the screenshot images:
You can repeat this step to get the direct links to the other types of screenshots.
Alternative - use Data Fetcher to create screenshots in Airtable
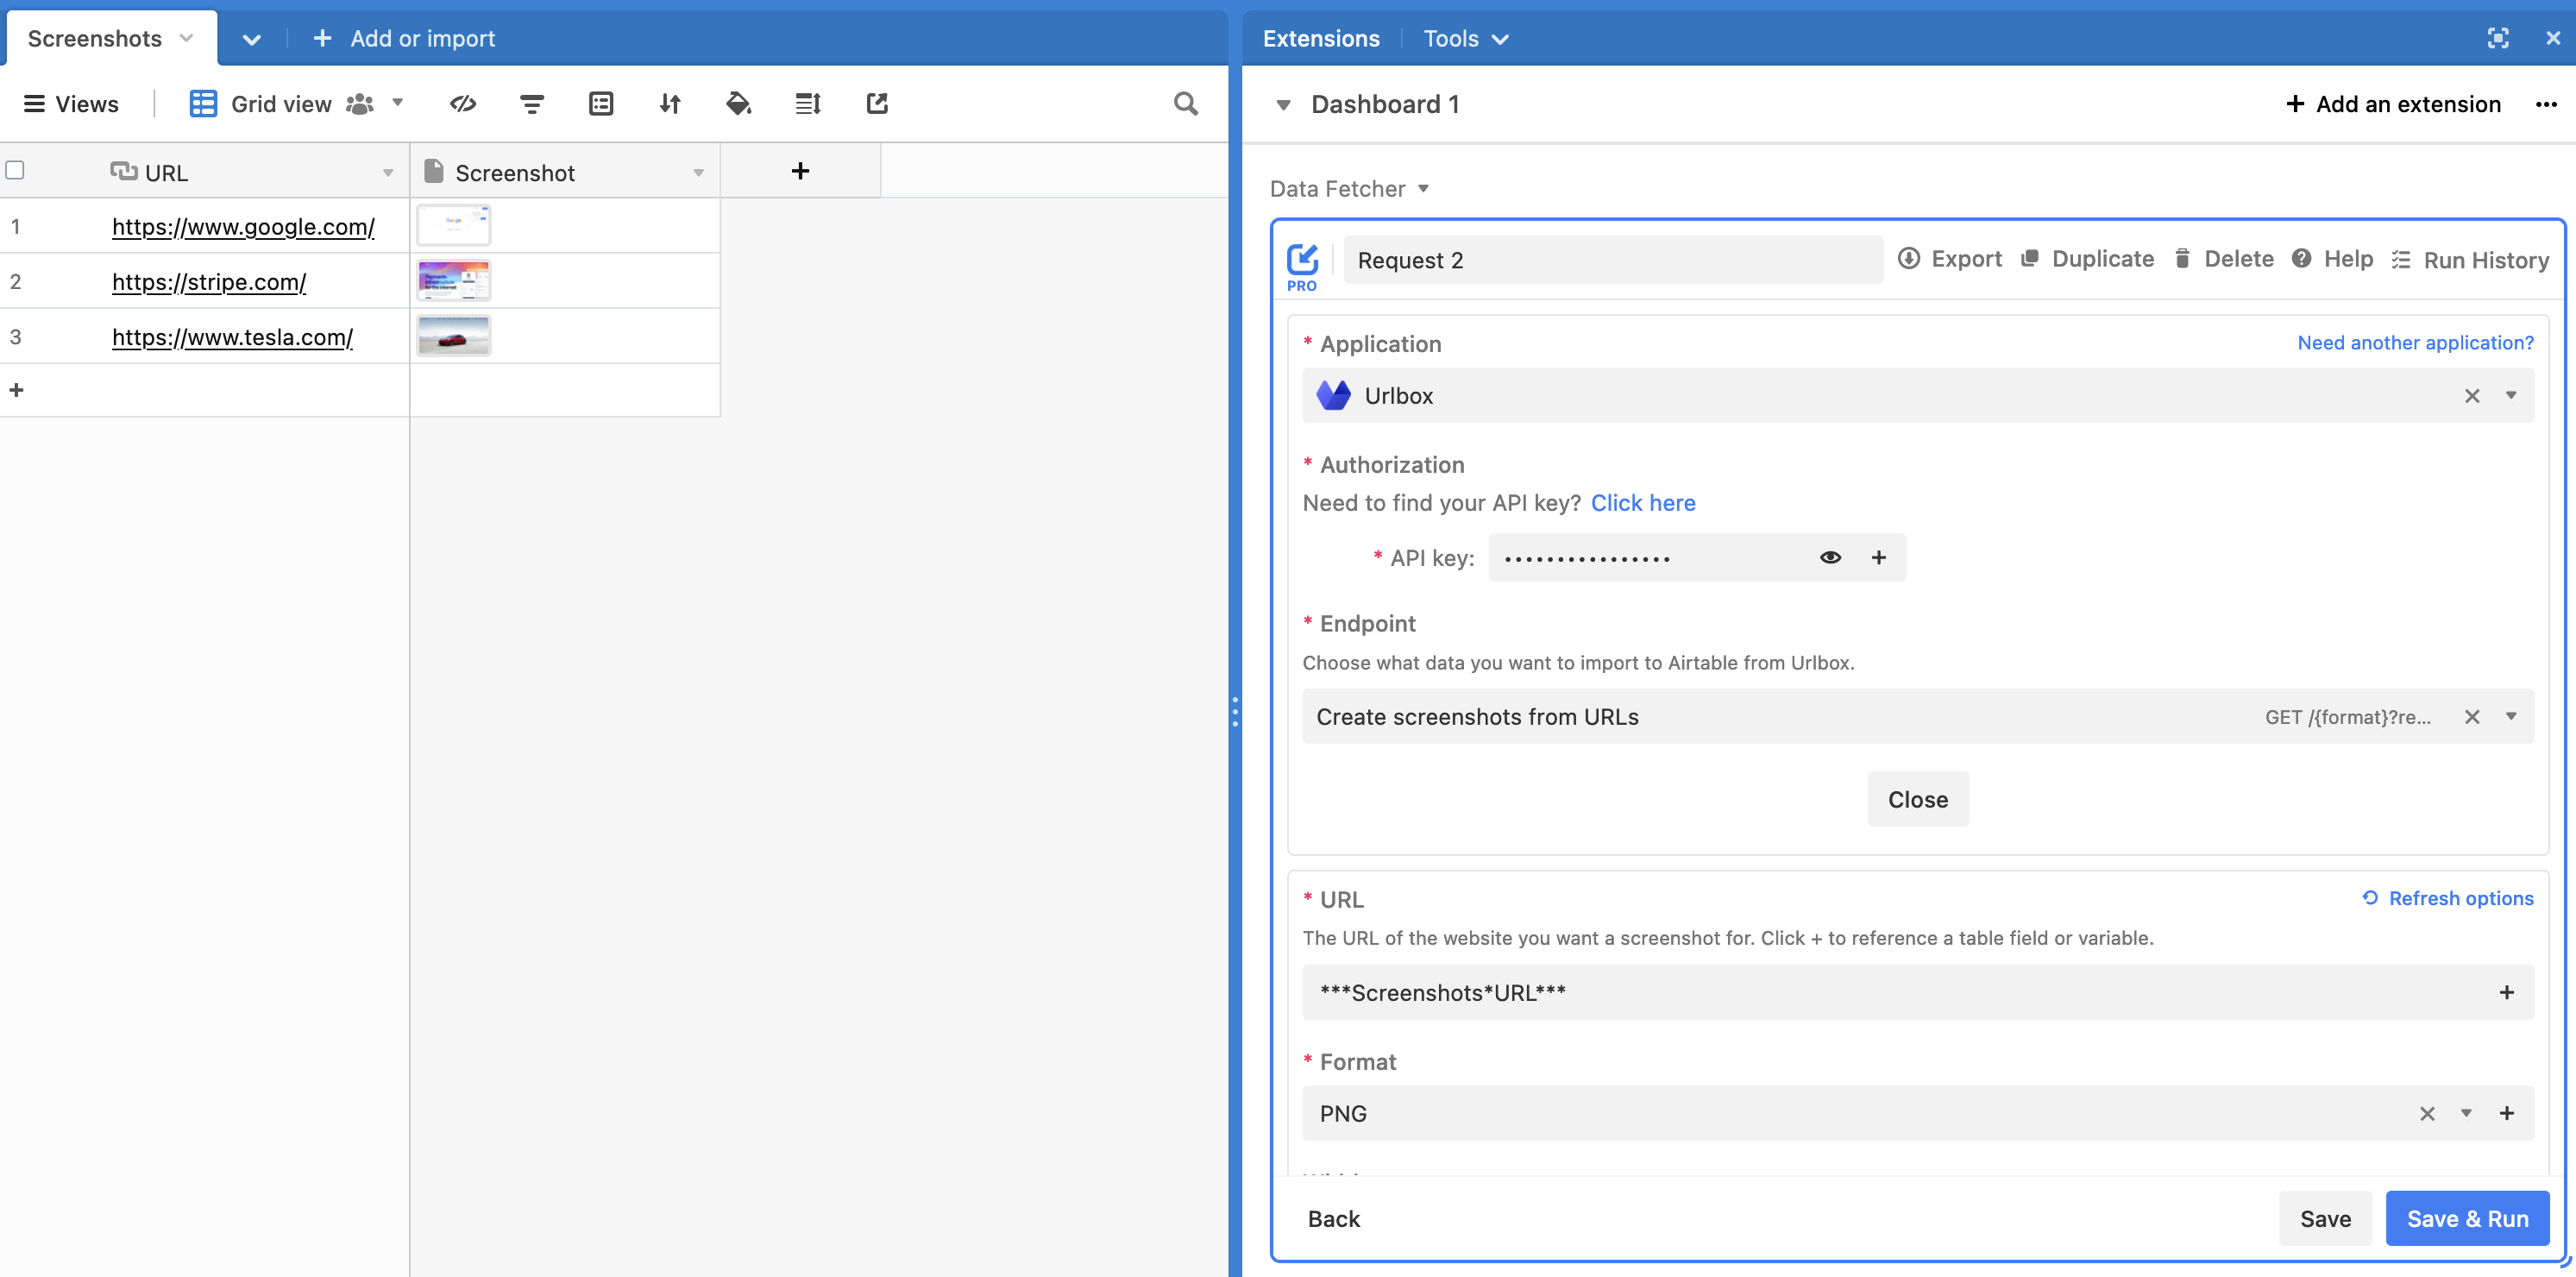
You can also use Data Fetcher's Urlbox integration to create screenshots in Airtable. Data Fetcher is an Airtable extension, so you can set up the integration and see the output without leaving Airtable.
Another thing that makes Data Fetcher stand out is you can run the Urlbox integration from a webhook. This means you can create a screenshot attachment as soon as a new record is created in your table.
It's free (forever) to run 100 API requests per month. If you want to run more than this, paid plans start at $24/month.
Conclusion
This guide described the steps needed to generate website screenshots from a list of URLs in Airtable.
We saw how to use Zapier to pull records in from Airtable, generate various kinds of screenshots in Urlbox, and update the records in Airtable with the screenshots.
You can also use Zapier and Urlbox to schedule website screenshots
